
How To Create an Asset
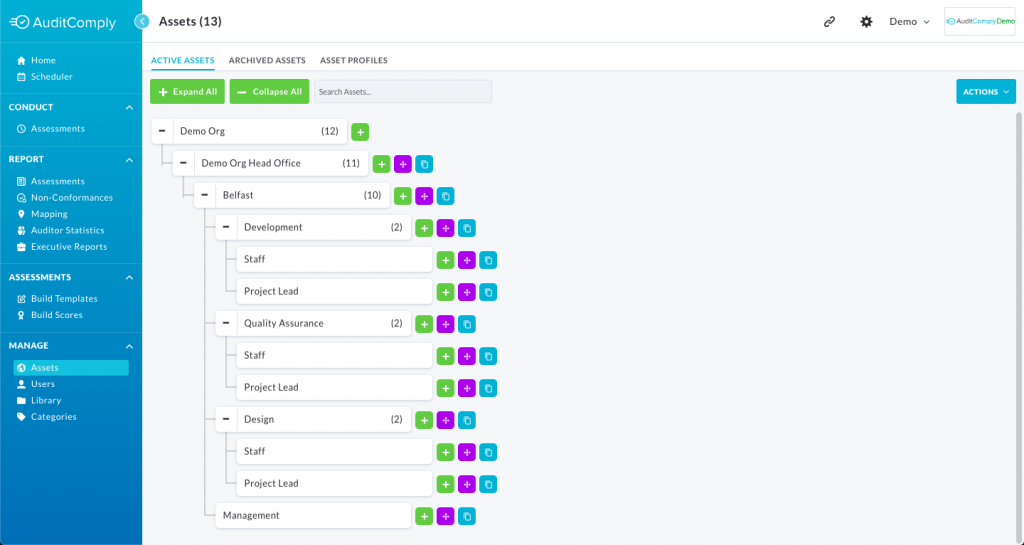
- Select “Assets” from your navigation bar.
- Select the ‘+’ beside the asset you wish to add a new branch to. This is known as the Parent Asset.
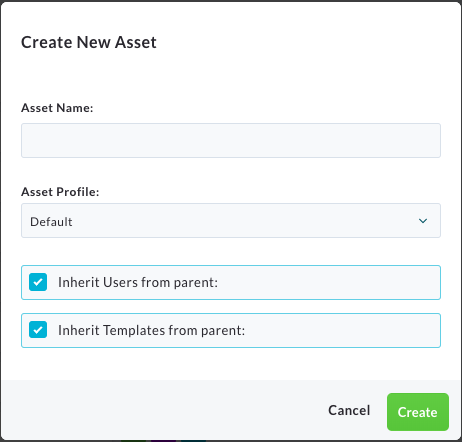
- When the asset creation modal appears, enter the name of the asset.
- Select the appropriate asset profile.
- Inherit Users from parent – This option will give all users who have access to the Parent Asset, access to the newly created Asset.
- Inherit Templates from parent – This option will give all templates which have access to the parent asset, access to the newly created Asset.
- Select “Create“
Managing an Asset
Rearranging an Asset
Below you will find a newly created Asset. You can now manage the Asset.

The purple icon will allow you to move the asset around the structure of your Organization. Once selected, simply drag the asset to the position you wish to move it to.
Copying an Asset

The blue Icon will create a duplicate of the asset. Once selected, the modal below appears
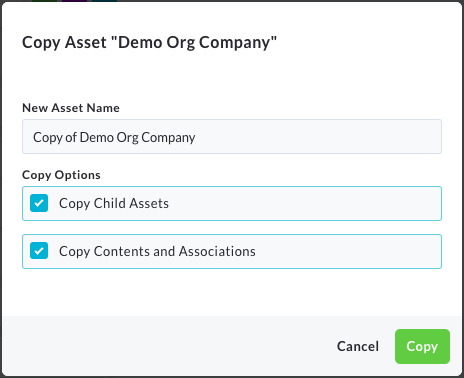
This allows you to change the name of the new asset with further copy options:
- “Copy Child Assets” – This will include all the “Children” of the copied asset.
- “Copy Contents and Associations” – This will copy all the details added to the asset, including User/Template access.
User/Template Access
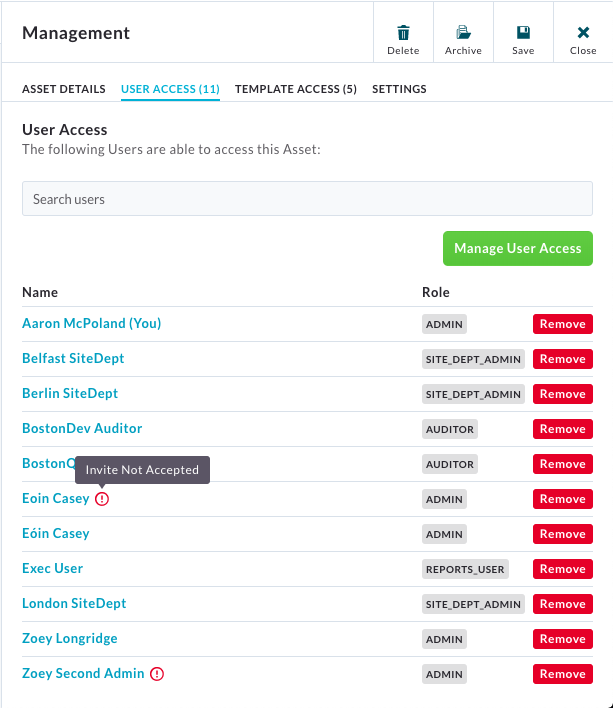
You can now manage user access and template access directly from the asset tree. This determines who has access to each asset, and which templates are associated with a particular asset.
You can also still view each Users access in their user profile. Likewise, you can view the Template access within the Template Settings.
To manage :
- Select the relevant Asset.
- To manage users, select “User Access”, followed by “Manage User Access”.
- To manage templates, select “Template Access”, followed by “Manage Template Access”.
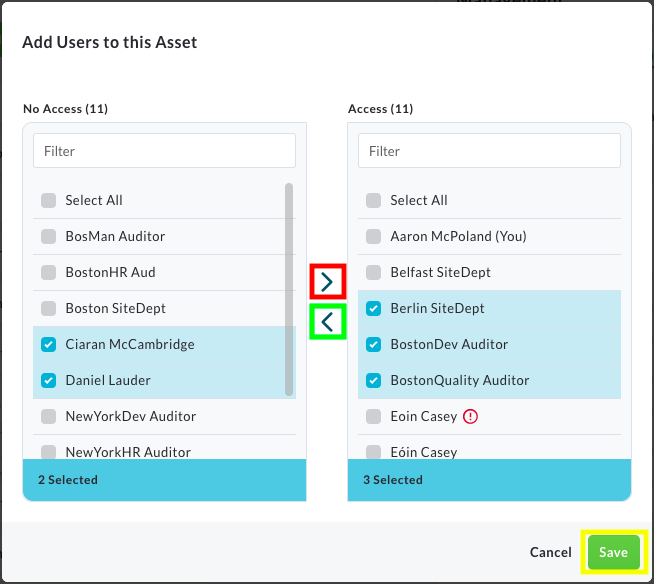
- You will see a modal like the one below. Simple click the Users/Templates that you wish to move, and then click the arrow (highlighted in red below) to move them to the “Access” side of the table.
- If you wish to remove access from any of the Users/Templates then select them on the right-hand side, and then select the left arrow (highlighted in green below), to move them to the “No Access” side of the table.
- Select Save to confirm your changes.
Adding an Asset Logo
Each Asset can have its own individual logo. This will overwrite the logo on your organization, allowing greater flexibility in reporting.
To add an Asset Logo
- Select the relevant Asset.
- Select the Settings Tab.
- Select the Text saying “Add Logo”.
- Select the Image from your computer you wish to give to this Asset
- Select Save.
