Every level of the Asset Tree, whether its a top level parent asset or a child asset, is interactive.
Clicking on any asset will open a detailed information panel to the right hand side of the main page.
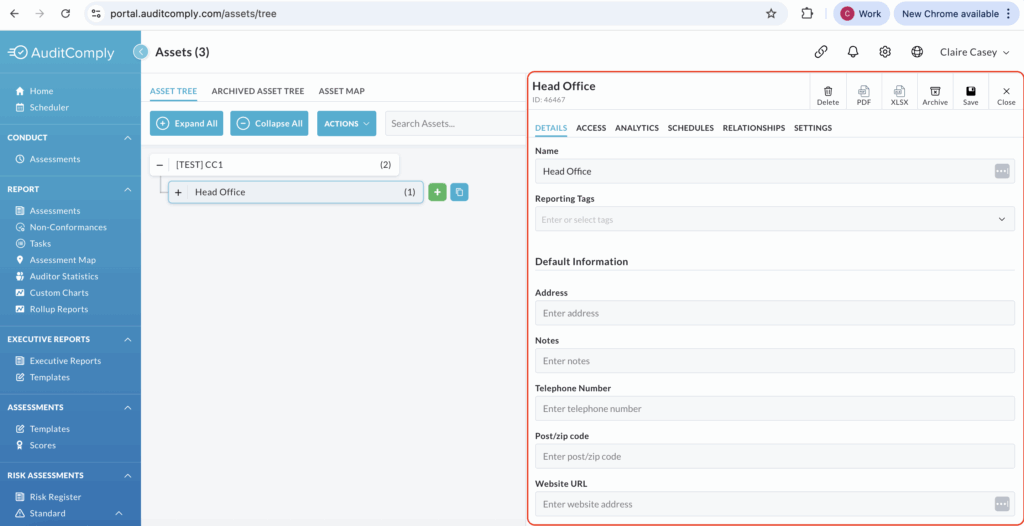
This panel contains several tabs where information can be viewed and managed.
This guide covers the Details and Access aspects of the Asset Tree.
Details
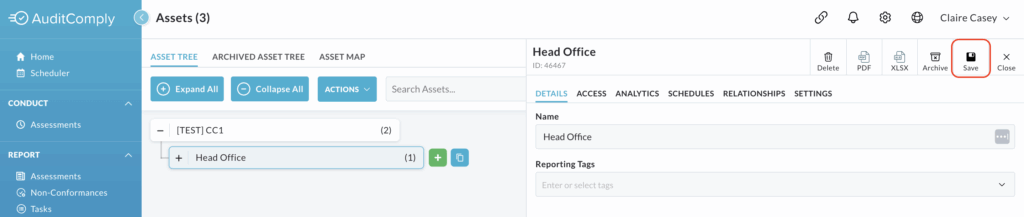
The Details tab is the primary area for managing core asset information.

Here you can:
- View, amend, or add the name of the asset.
- Manage any reporting tags associated with the asset
- View and update all the contact information relevant to the asset.
To apply any changes you make within this tab, amend the information in the relevant text boxes, and then click Save at the top of the details panel.
Access
The Access tab within the asset details panel is where you can manage permissions for various elements related to the specific asset.
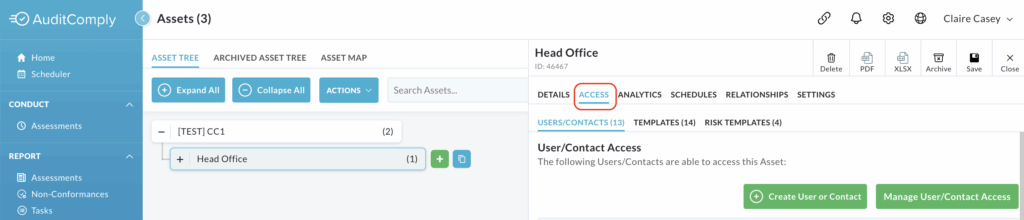
This tab is divided into three subtabs: Users/Contacts, Templates and Risk Templates.
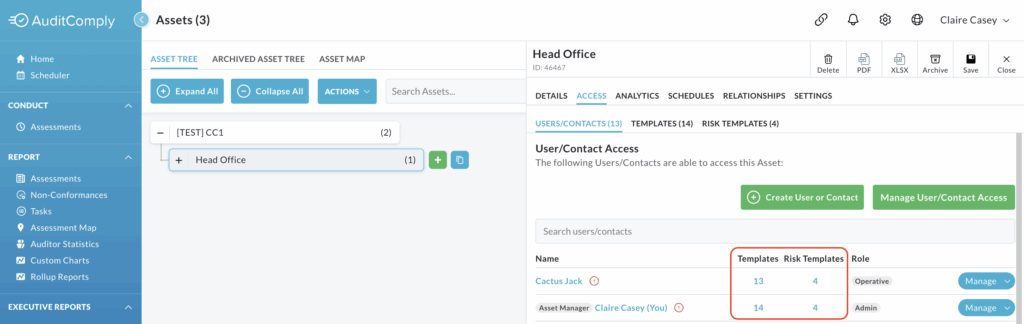
User/Contact Access
This subtab lists all the users and contacts who have been granted access to this specific asset.
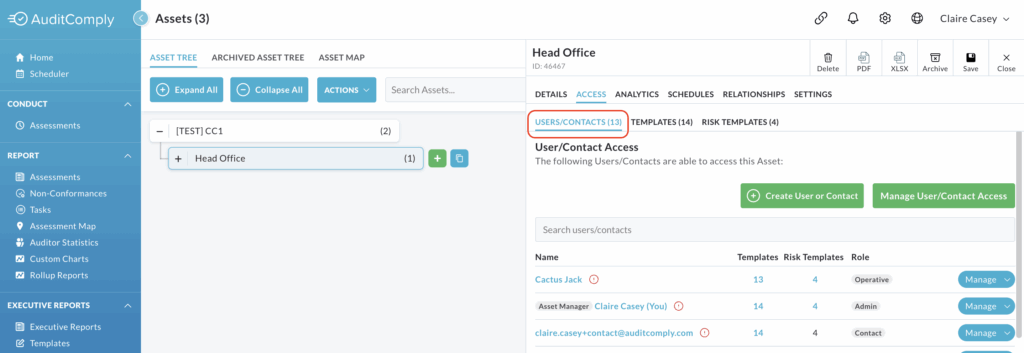
The table displayed shows the users name, their assigned role and the number of templates/risk templates they have access to.
Clicking on a user’s name will direct you to their profile within your administration panel, allowing you to view, or amend their details, permissions permitting.
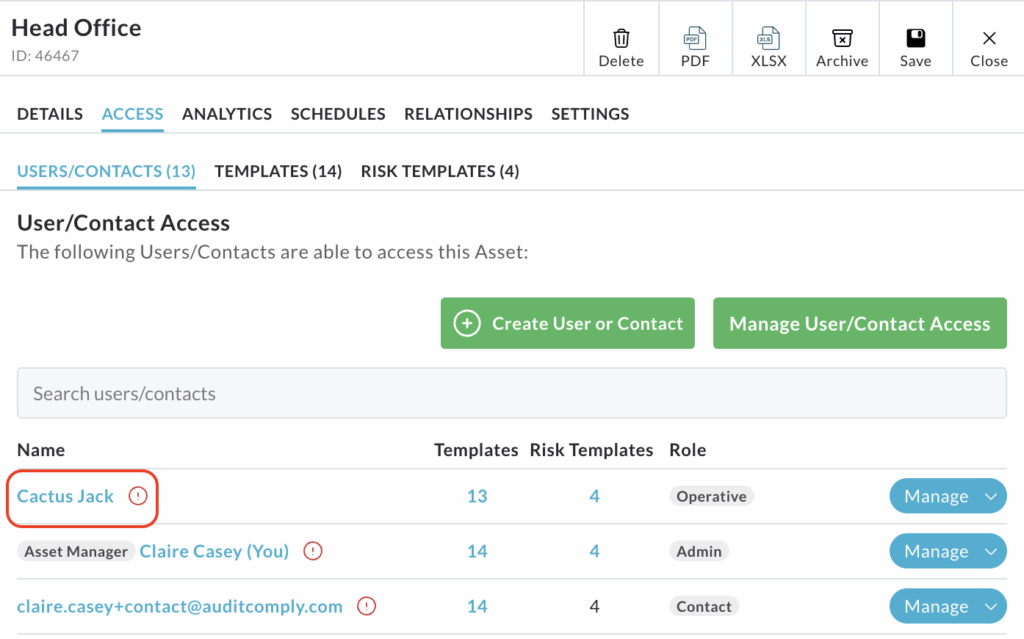
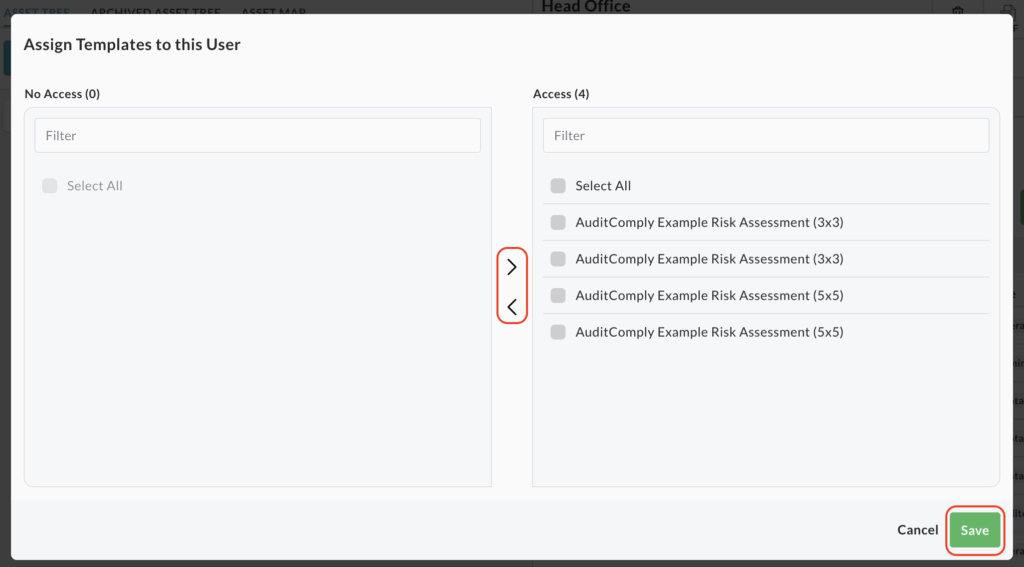
Clicking on the number listed under either Templates or Risk Templates for a specific user will open a pop-up window.
This window displays the specific templates available to that user.
Within this pop up, you can manage their access by moving templates between access and no-access columns using the directional arrows.
This allows you to remove, or add, specific templates from that user’s permissions for this asset.
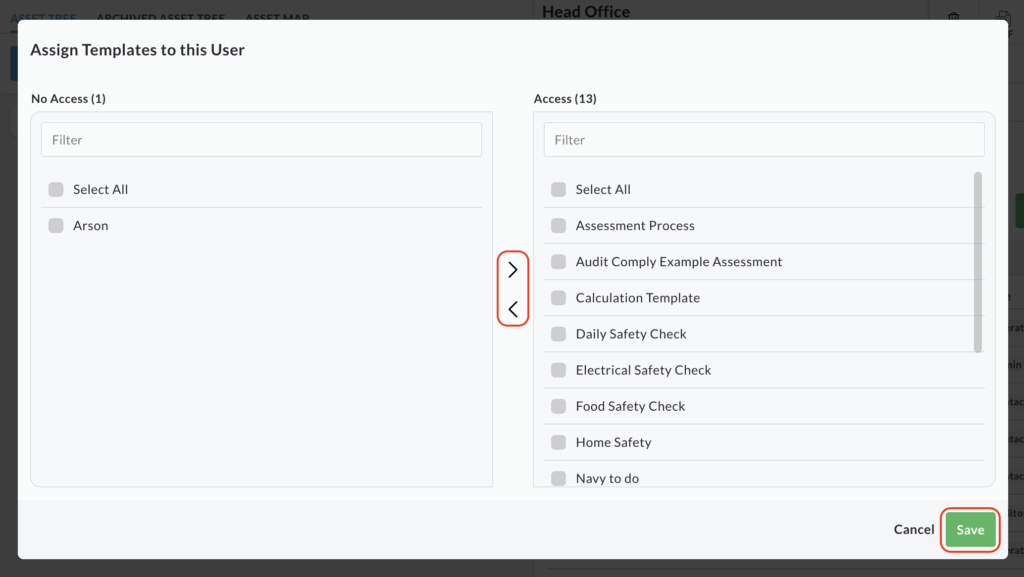
After making any changes to template access, click Save to apply the updates.
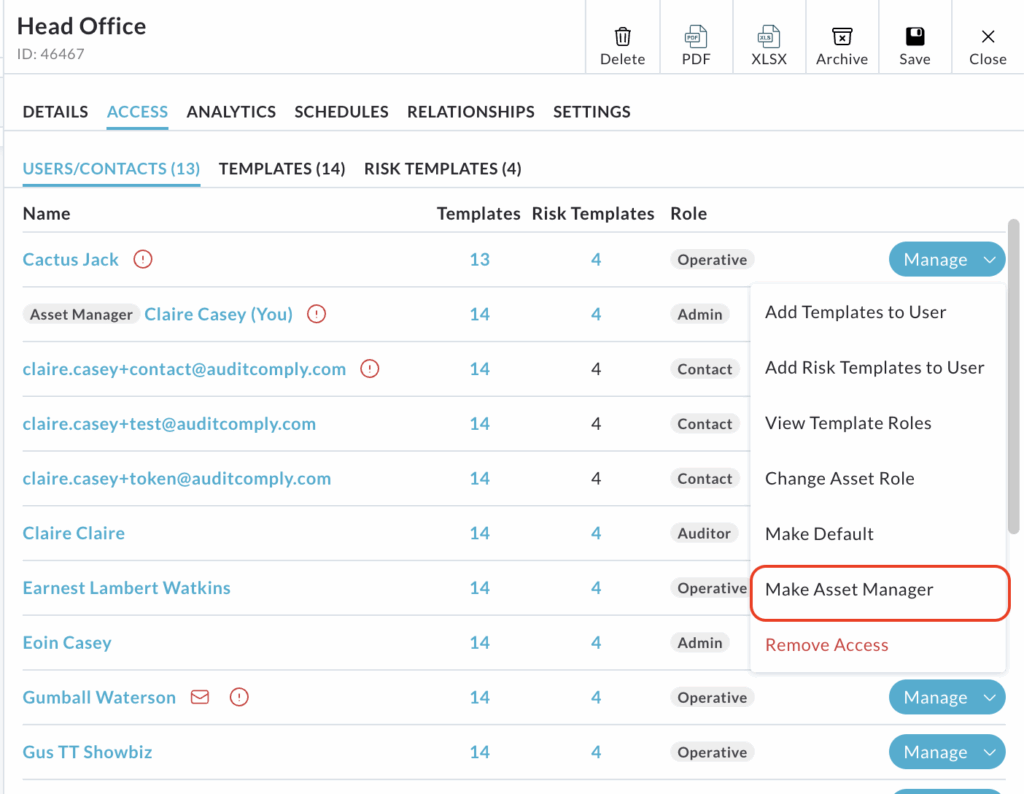
User/Contact Access Management
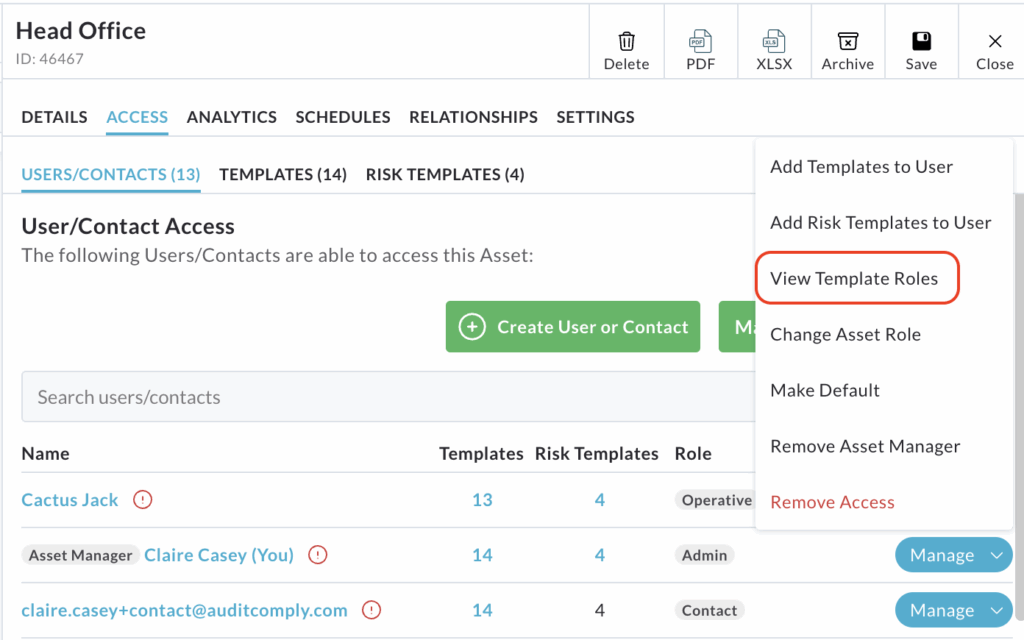
Within the User/Contact Access table, each user row includes a Manage button at the end, which opens a dropdown menu with advanced management options.
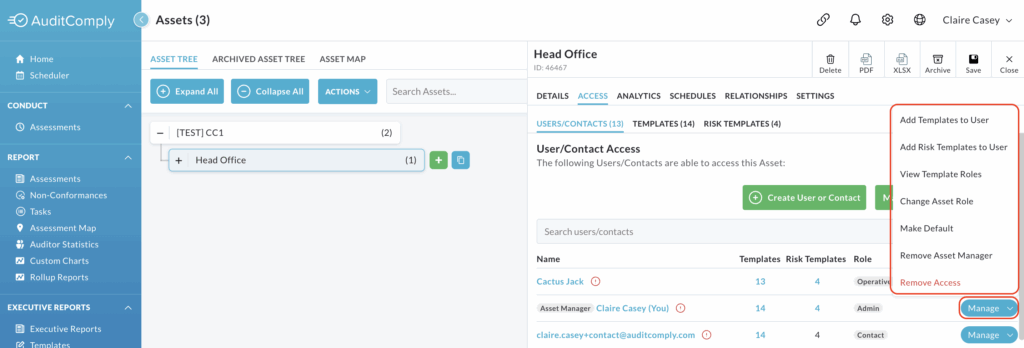
Add Templates to User/ Add Risk Templates to User
These two options function similarly, allowing you to quickly modify a user’s access to specific audit and risk templates for the current asset.
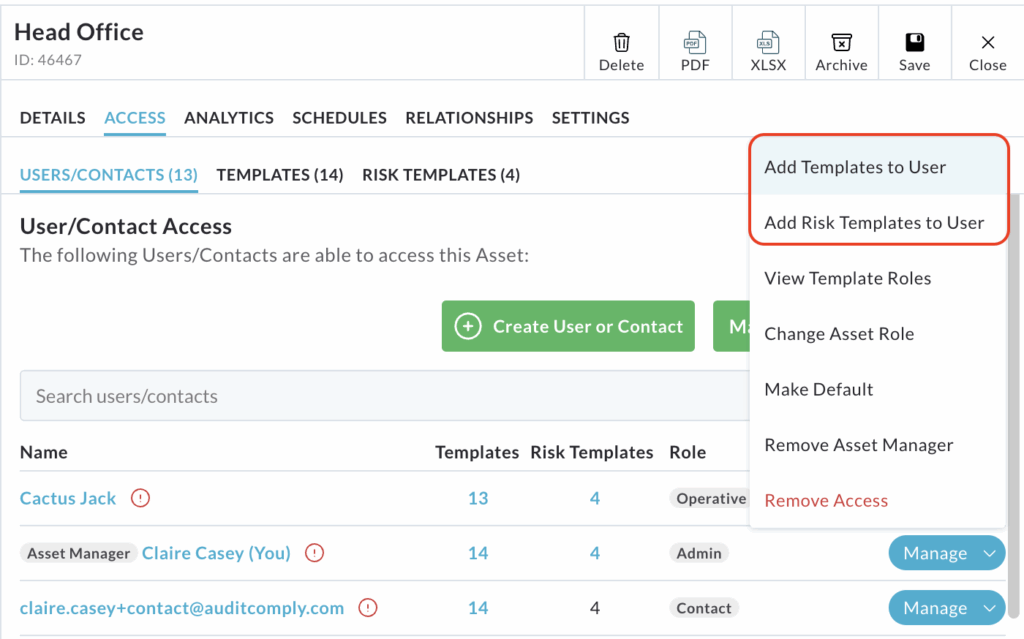
Both options open a pop up window showing the templates currently available to the user.
Select the templates you wish to add or remove from their profile.
Use the directional arrows in the centre of the pop up to move templates between the Access and No Access columns.
Click Save to apply the changes to the user’s template permissions for this asset.
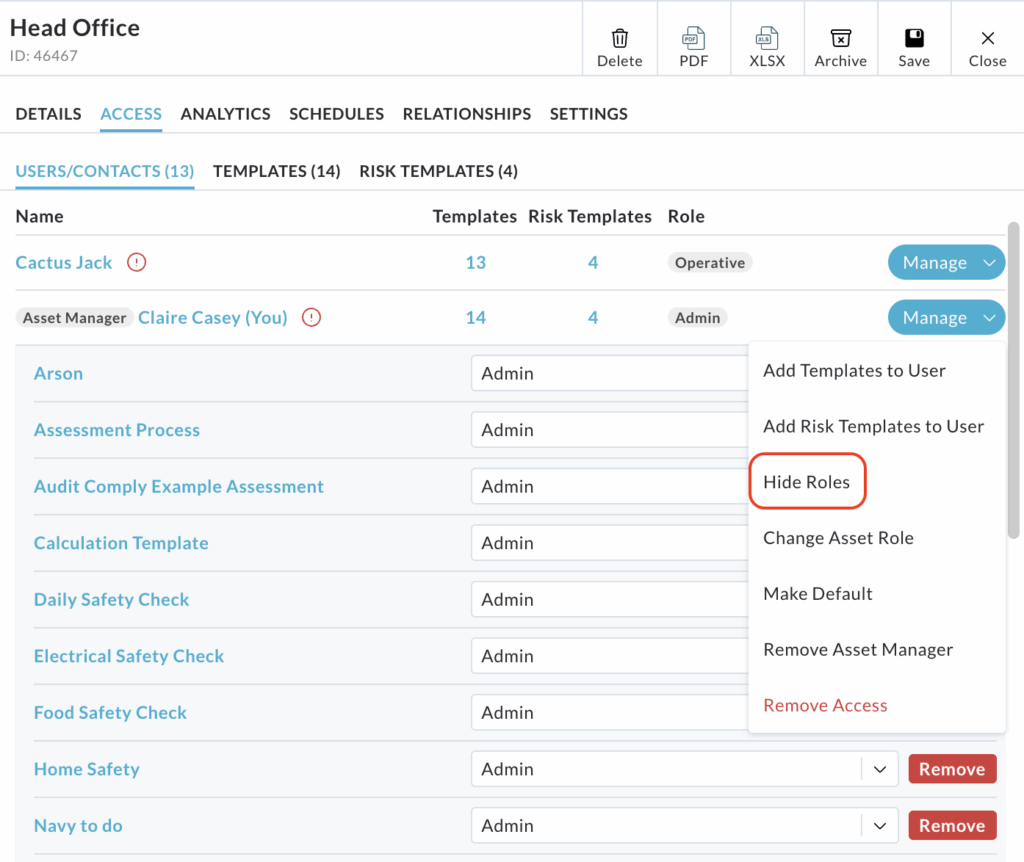
View Template Roles
This option provides a detailed, template-specific view of the user’s permissions.
Selecting View Template Roles changes the current screen layout.
All templates available to that user are listed directly beneath the user’s name.
Critically, the users role (e.g. Auditor) is displayed for each specific template.
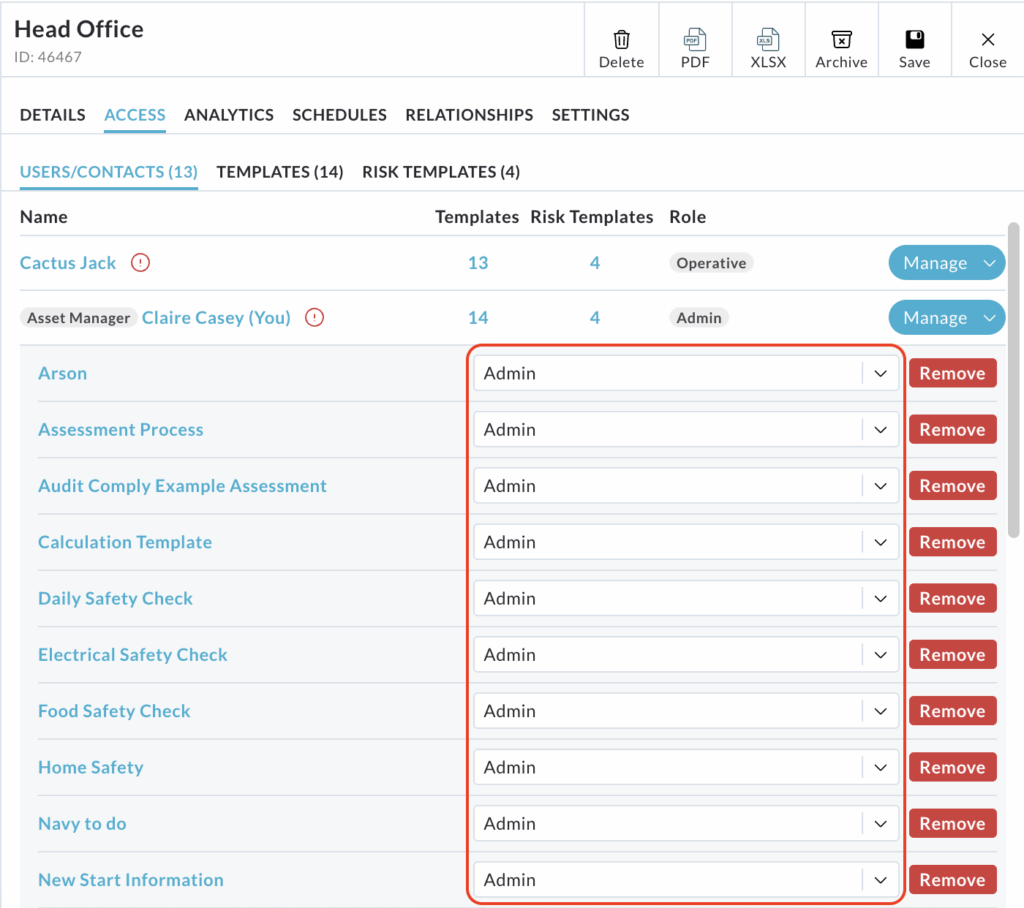
For Users: for regular platform users, the user role can be changed directly on this screen. Click the dropdown menu displaying the role and select the new role you wish to assign.
For Contact Users: for contact users, the template role cannot be amended.
A Remove button is available next to each template.
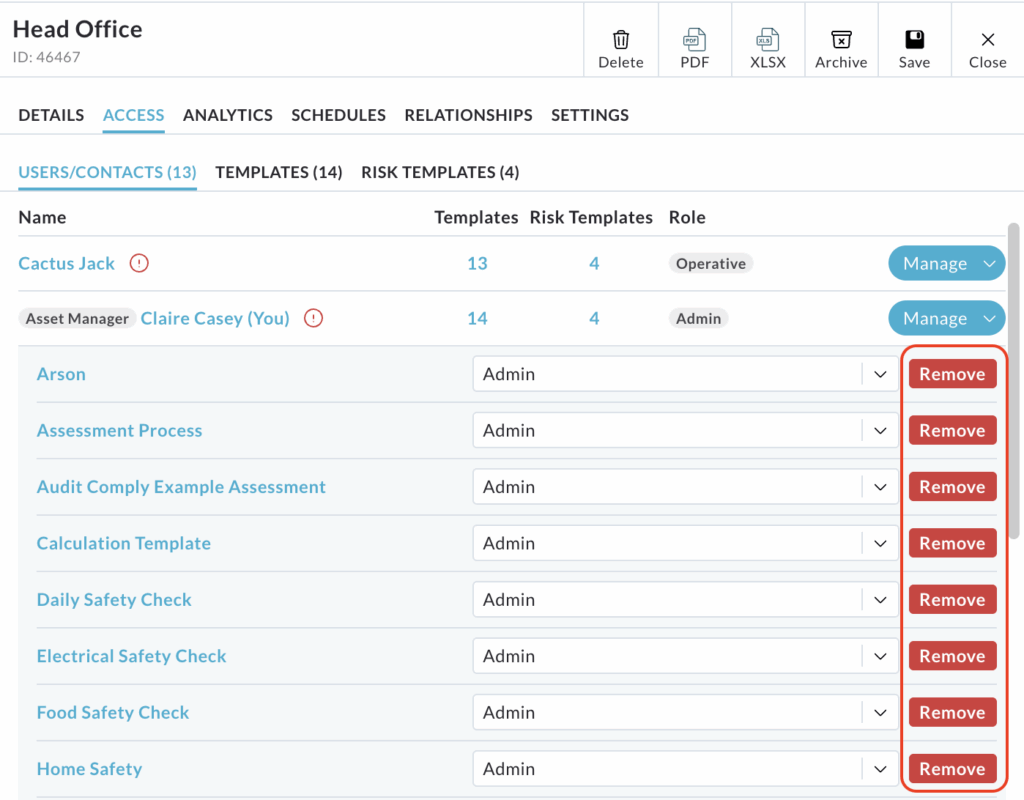
Clicking this button will immediately revoke the user’s access to that particular template for this asset.
To return the screen to the default User/Contact Access menu view, click Manage again, then select Hide Roles.
Saving Note: All changes made while viewing or amending Template Roles on this screen are saved automatically.
Change Asset Role
This option allows you to quickly update the user’s overall role assigned to this specific asset.
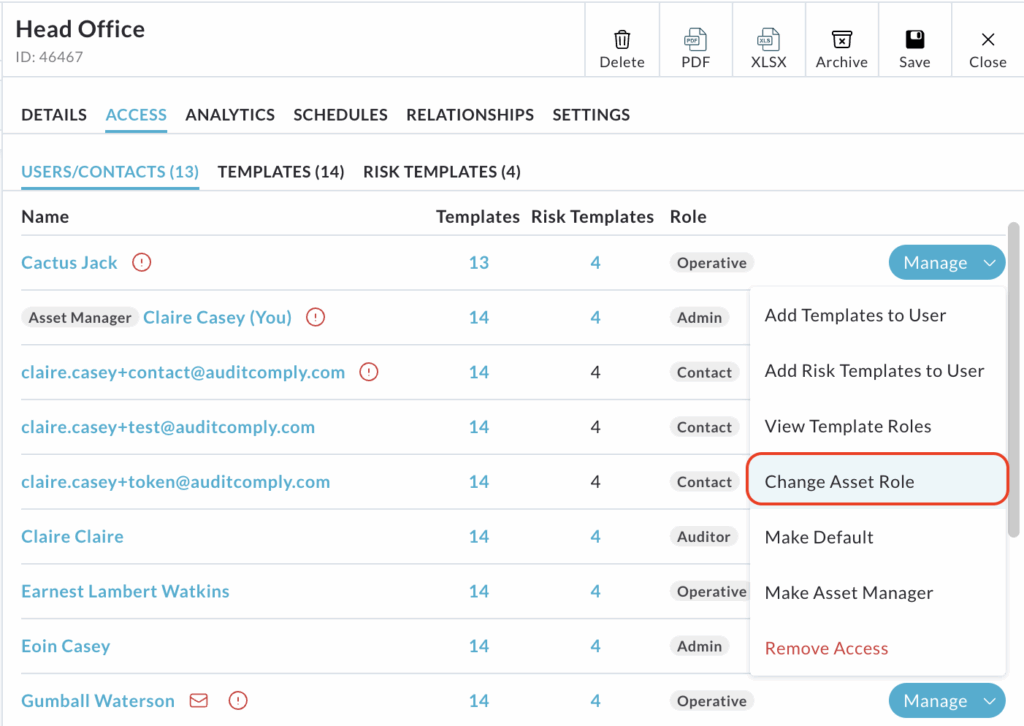
Clicking Change Asset Role from the dropdown menu will open a pop up window.

Use the provided dropdown menu to select the new asset role you wish to assign the user.
Click Update Role to save and apply the change.
Make Default
Selecting this option designates the user as the default contact for the asset, which streamlines the assignment of issues.
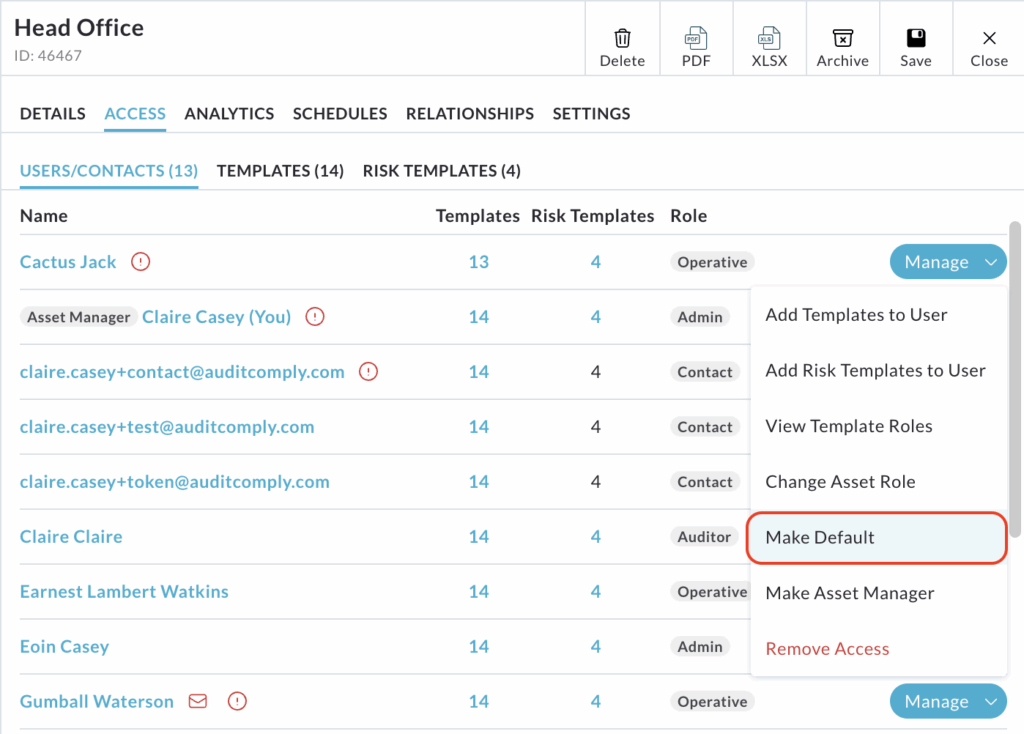
Choosing Make Default will prompt a confirmation message.
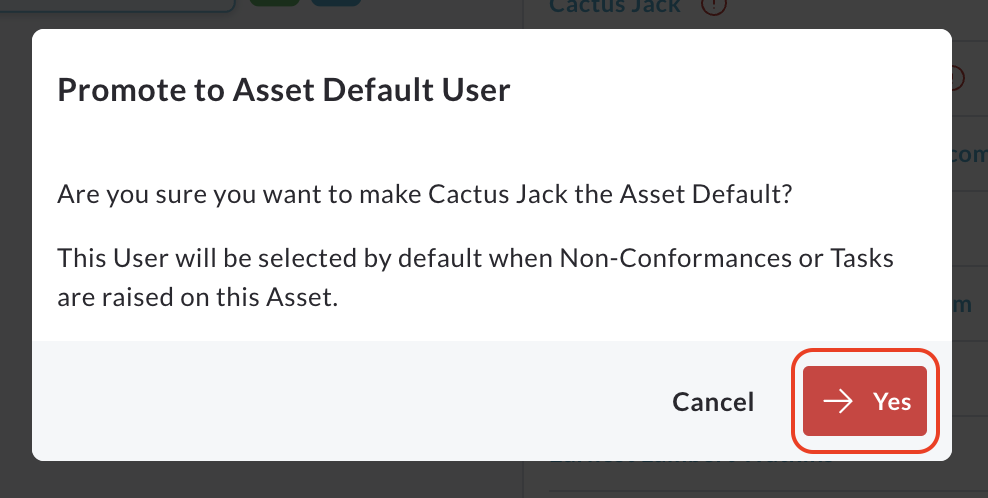
Once confirmed, this user will be selected by default when non-conformances or tasks are raised or generated on this asset. This ensures that new issues are automatically routed to a responsible party.
To finalise this change, click Yes on the confirmation prompt.
Make Asset Manager
Selecting this option assigns the responsibility of Asset Manager for the current asset to the selected user.
Clicking Make Asset Manager will open a pop up confirmation window.
The pop up asks you to confirm that you want to assign the Asset Manager role to the selected user.
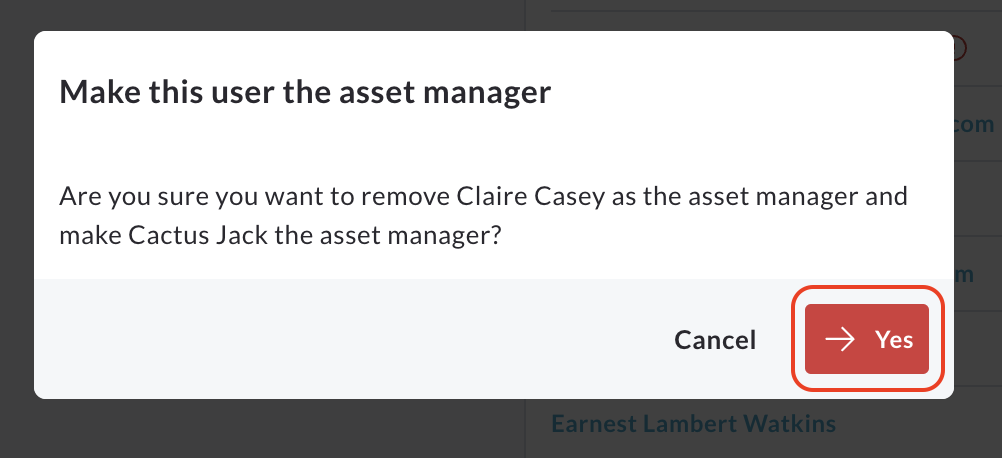
To confirm this action and assign this role, click Yes.
To abandon the action and return to the previous menu, click Cancel.
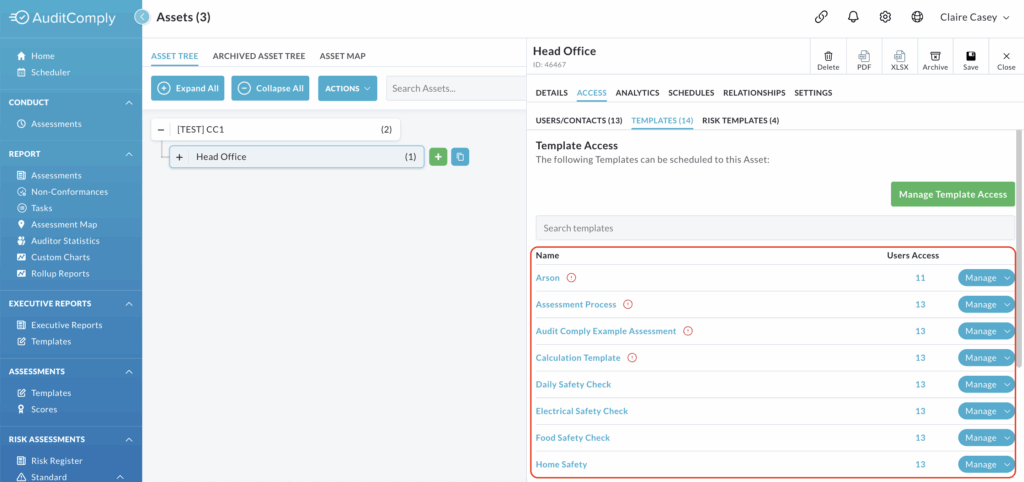
Template Access
The second and third subtab under the Access tab is Templates and Risk Templates.
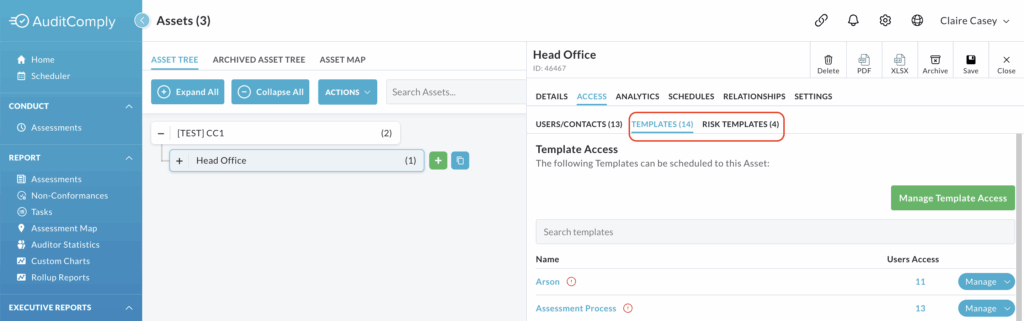
This section manages which audit and risk templates can be scheduled or utilized against the current asset.
Manage Template Access
For a quick and centralised way to view and amend which templates the asset is connected to, click Manage (Risk) Template Access.

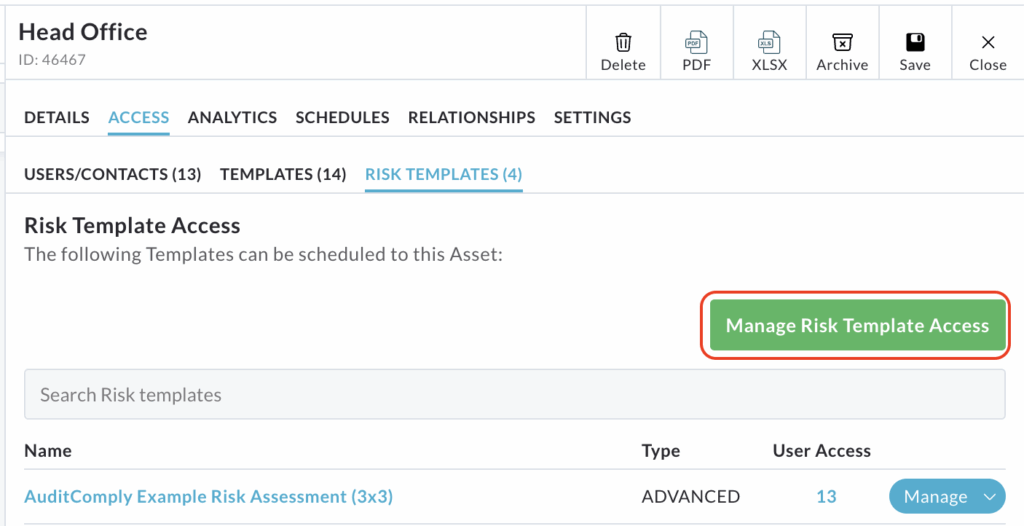
A pop up window will appear, displaying two columns: Access (templates currently available to the asset) and No Access (templates not currently available).
Select the relevant templates you wish to move.
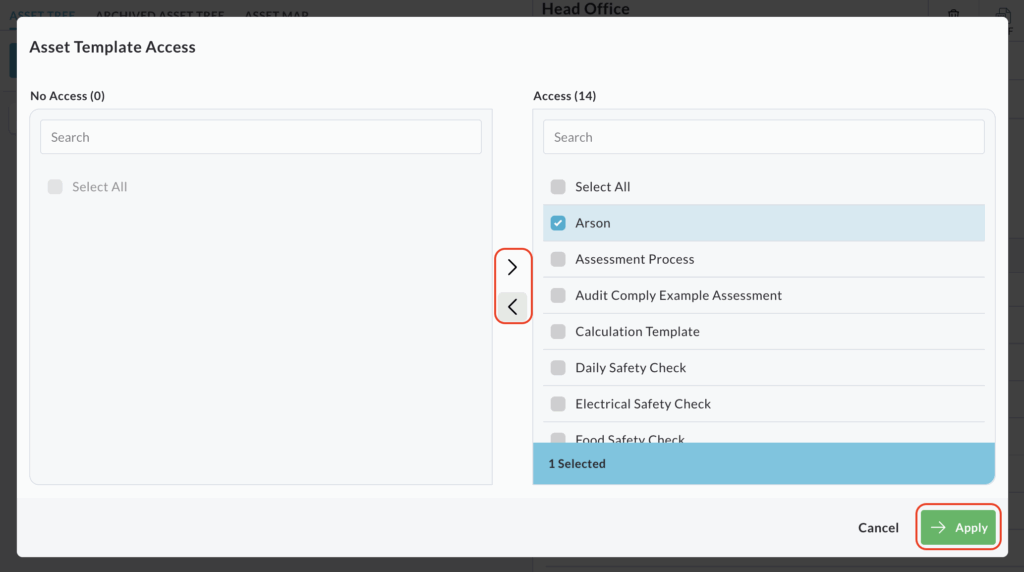
Use the directional arrows in the centre of the column to move the selected templates to the required column (either granting or revoking access).
Once all templates are in their desired columns, click Apply to save the changes to the asset’s template permissions.
Main Table
A table is displayed listing all the templates/ risk templates that are currently available to be scheduled against the selected asset.
Template Name
Clicking on any template/ risk template name in the table will open the full template interface. From here, you can view all the template details, make edits and even schedule the template for use.
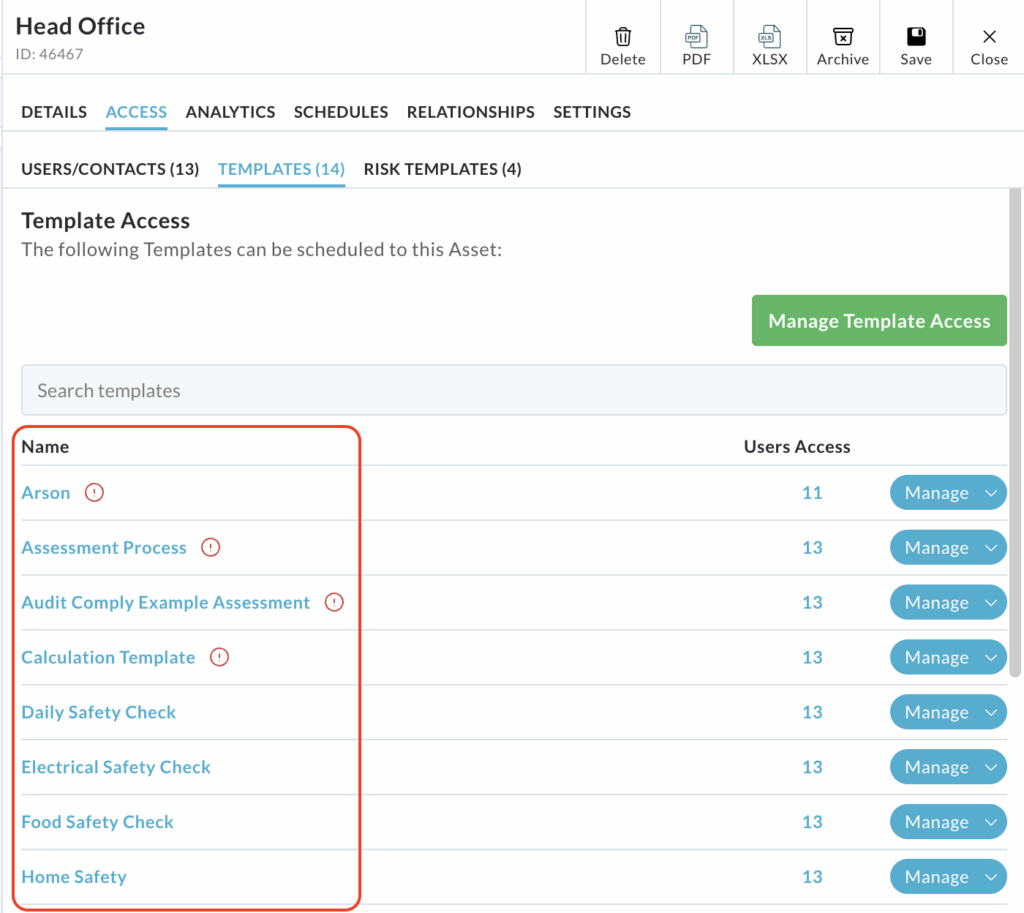
If an exclamation point is displayed next to the template name, it indicates that this specific template currently has active non-conformances, tasks or schedules associated with it on this asset.

User Access
The User Access column displays a number indicating how many users currently have access to the related template on this asset.
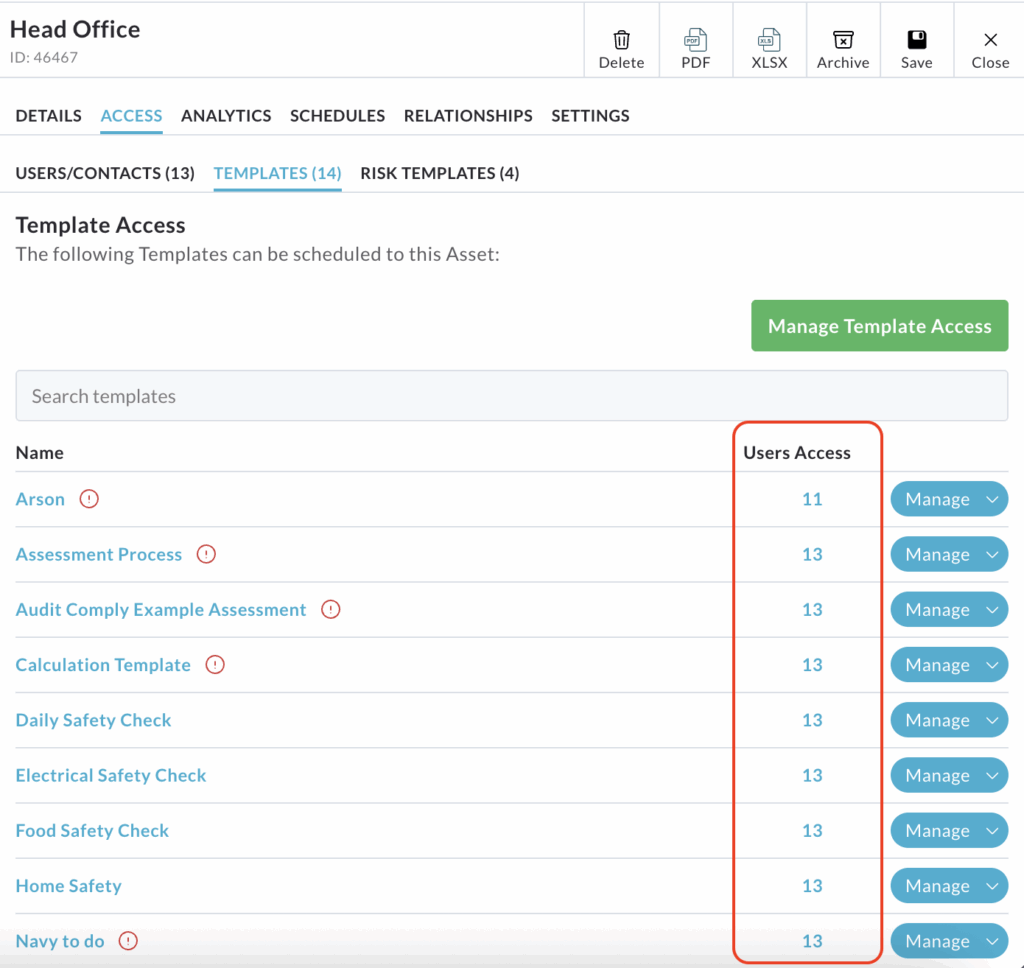
Clicking on this number will open a pop up window, listing all the users and contacts who currently have access to that specific template.
Within this pop up, you can amend access by selecting users you wish to either restrict or enable access for.

Use the directional arrows between the Access and No Access columns to move users accordingly.
Click Save to apply the changes to who can use this template on this asset.
Manage
In addition to managing access via the user count, each template row in the table includes a Manage button for granular control, revealing a dropdown menu with several options.
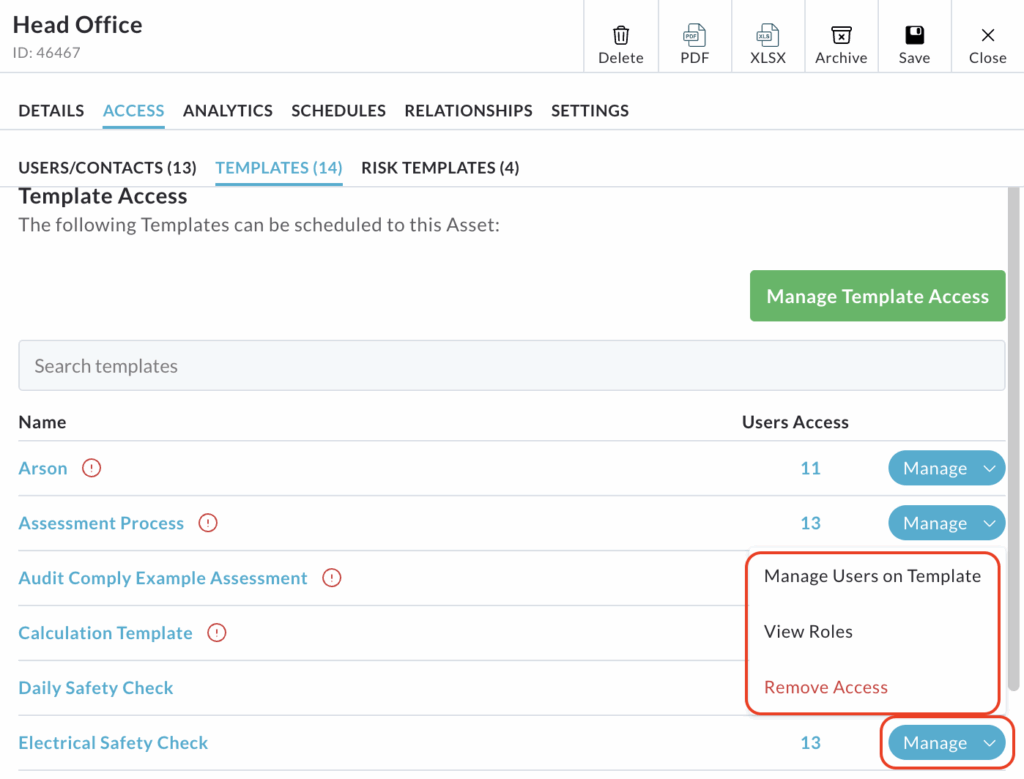
Manage Users on Template
This option provides a direct way to modify the list of users who can utilise the specific template on this asset.
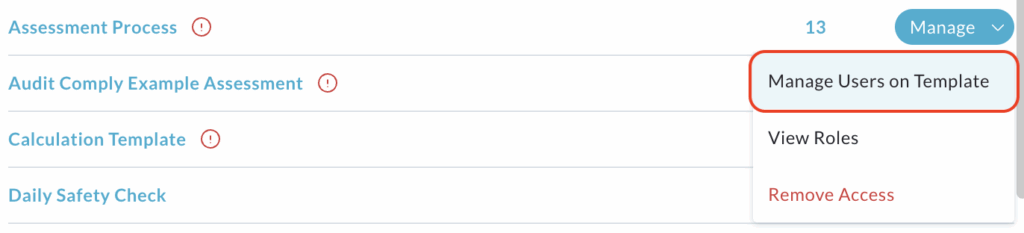
Clicking Manage Users on Template opens a pop up window identical to the one accessed by clicking the number under the User Access column.
Use the directional arrows to move users between Access and No Access columns to update their permissions for the selected templates.
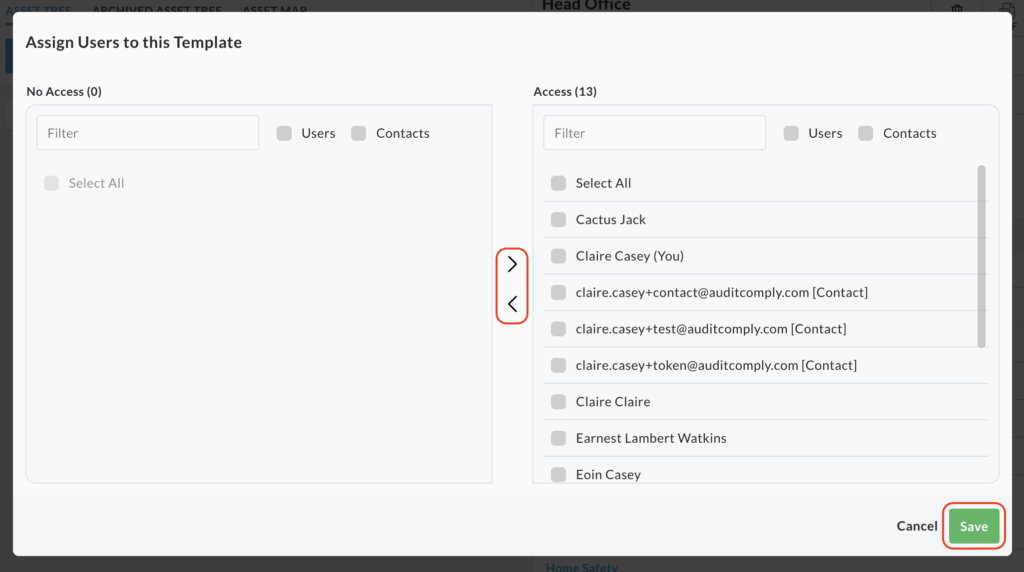
Click Save to apply the changes.
View Roles
Selecting this option provides a detailed breakdown of each user’s specific role for the selected template.

The current view of the Template Access or Risk Template Access, depending on which subtab you are accessing, is replaced, displaying all the users with access to the template below.
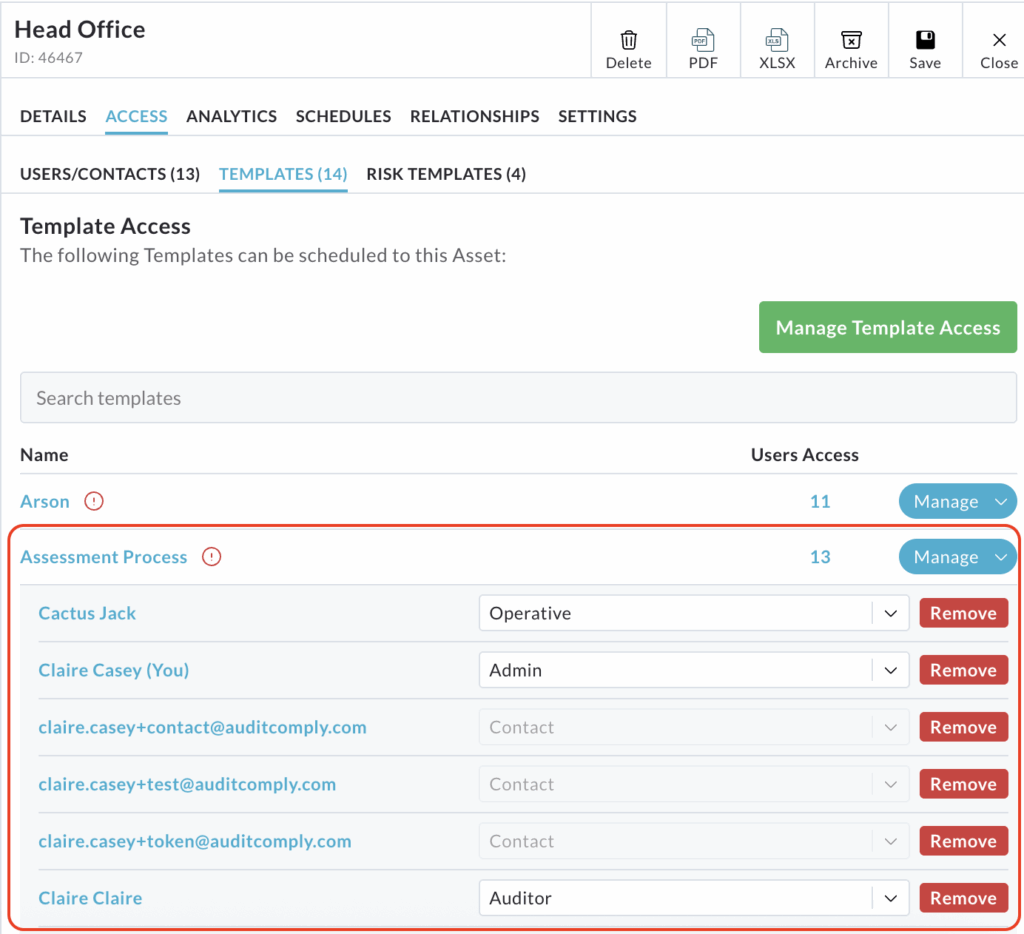
The screen lists every user’s name alongside their assigned role in relation to that template.
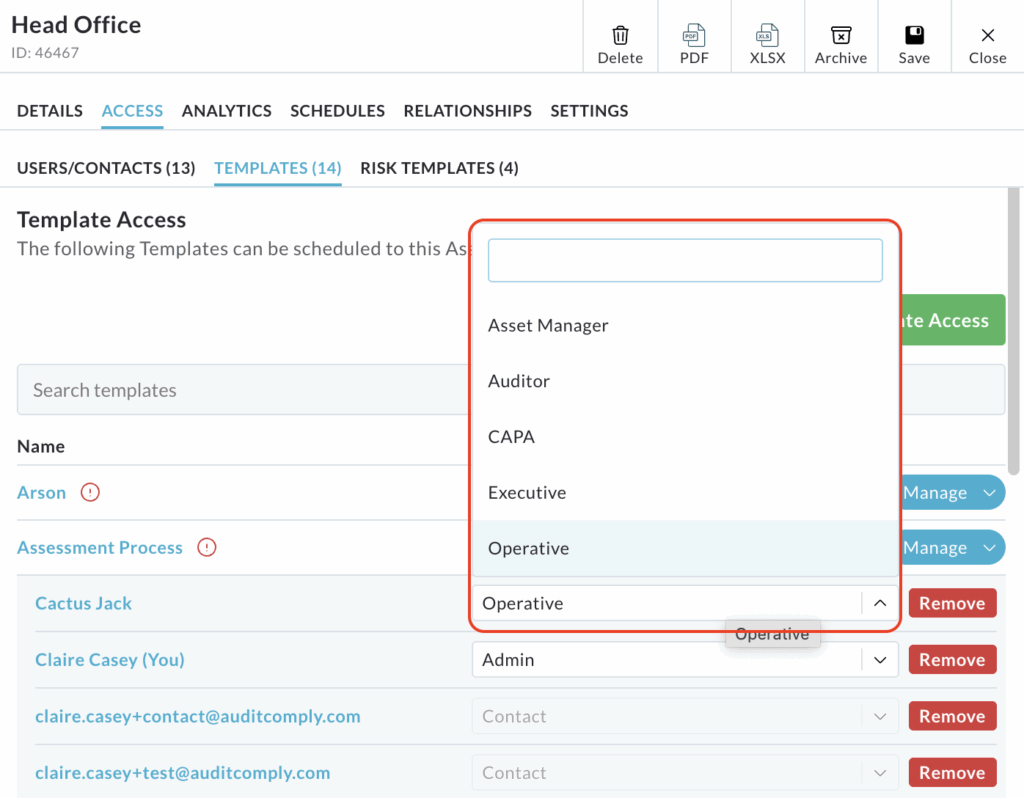
Clicking the dropdown menu available in the Role column will enable you to amend the role for the selected user.
Please note: Contact Users roles cannot be amended.
A Remove button is available at the end of each user’s row.
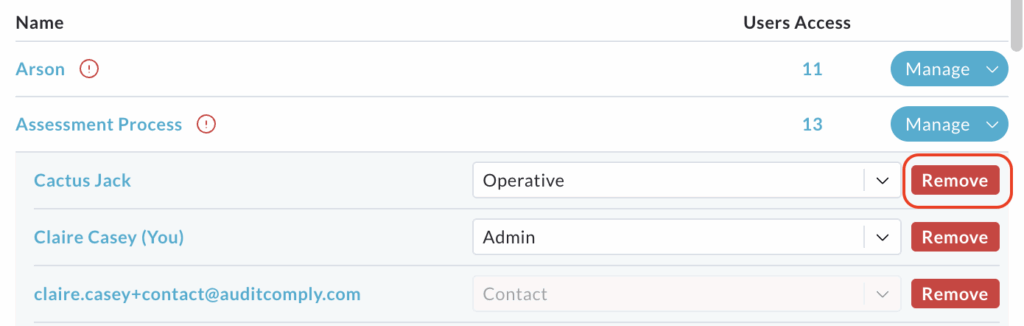
Clicking Remove will immediately revoke that user’s access to the template on this asset.
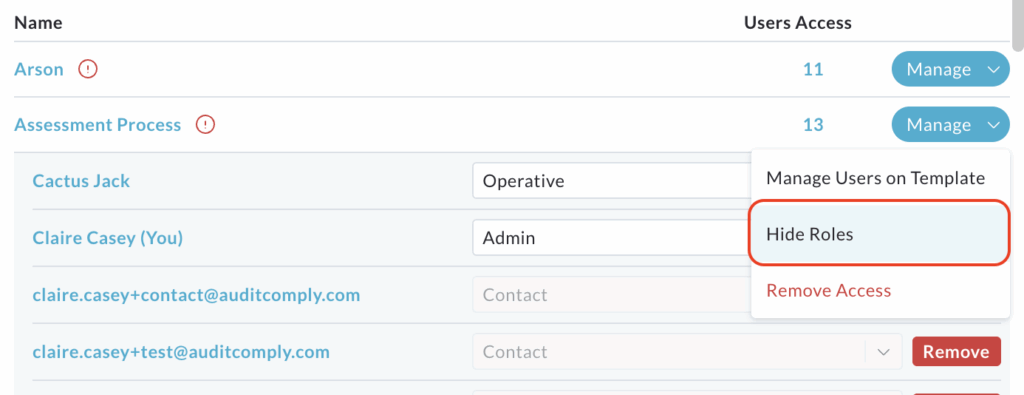
To restore the original menu view, click Manage, then select Hide Roles.
Removing Access
Selecting Remove Access from the dropdown menu will remove the current asset’s ability to utilise the selected template or risk template.

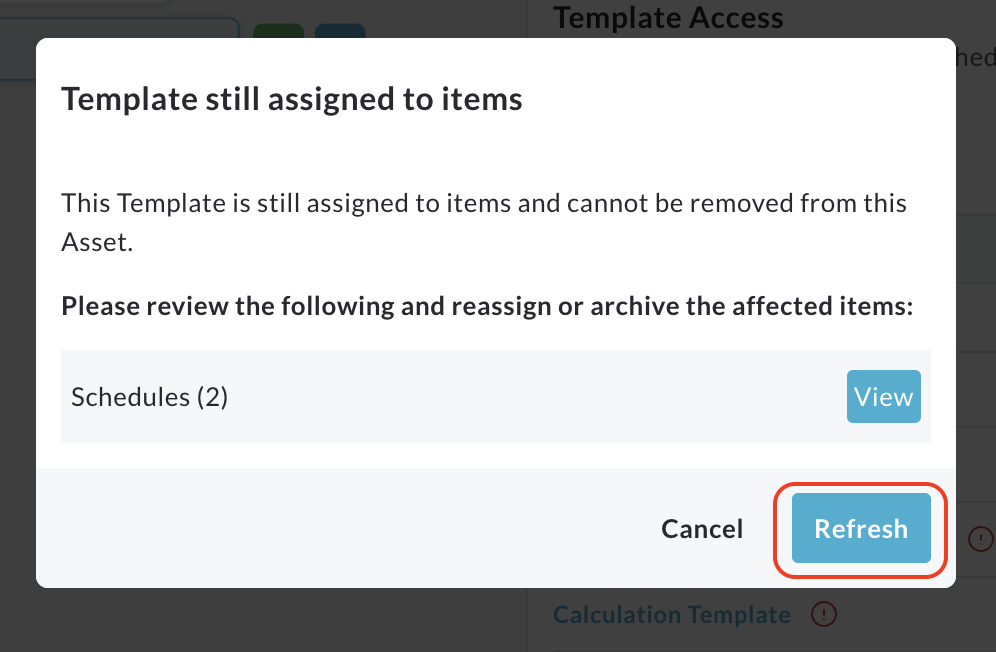
You will be unable to remove access if this template is currently assigned to any active items on this asset.
If this occurs, a pop up window will appear, directing you to reassign or archive the affected items that are preventing the template from being unlinked.
Click View in the pop up window and take the necessary action (reassign or archive) the required items.
Once completed, return to the Remove Access pop up.
If all actions have been successfully completed, you should be able to confirm and proceed with removing access.