This section describes the settings for managing non-conformances, including Corrective and Preventative Actions (CAPA) within the portal.
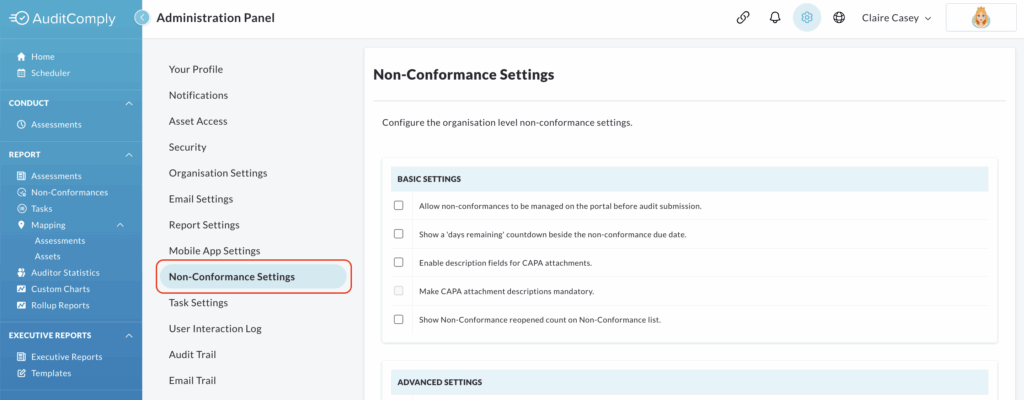
Basic Settings
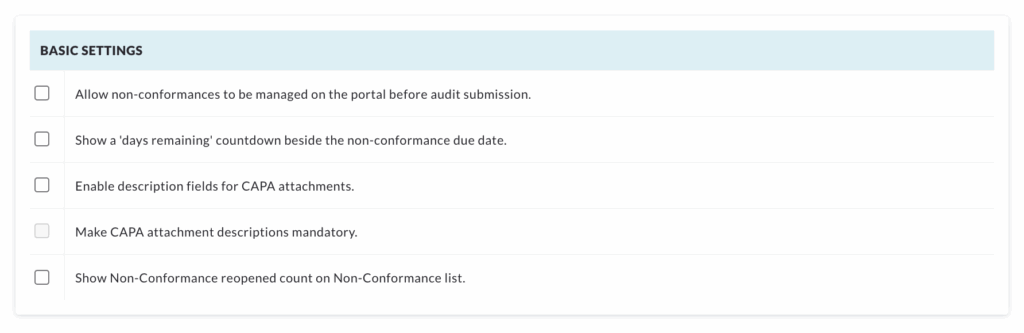

This setting allows managing non-conformances before the audit is submitted.
Enabling this setting makes them immediately visible on the non-conformance list.

This displays a countdown timer for non-conformance due dates.
This can be viewed by going into your non-conformance list and clicking on the non-conformance. A countdown will now be visible beside the due date, as shown below.


Selecting this setting places a description text box beside CAPA attachments.
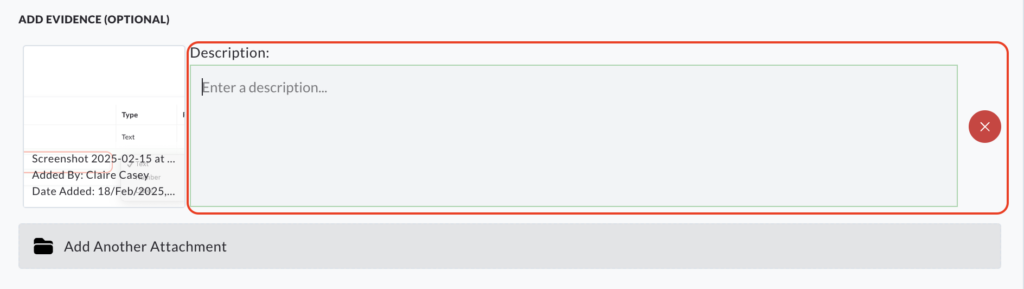

This setting can only be selected if the previous setting has been applied.
This makes completing the description field for CAPA attachments mandatory.

This shows the number of times a non-conformance has been reopened in the non-conformance list under the Status column.
Advanced Settings
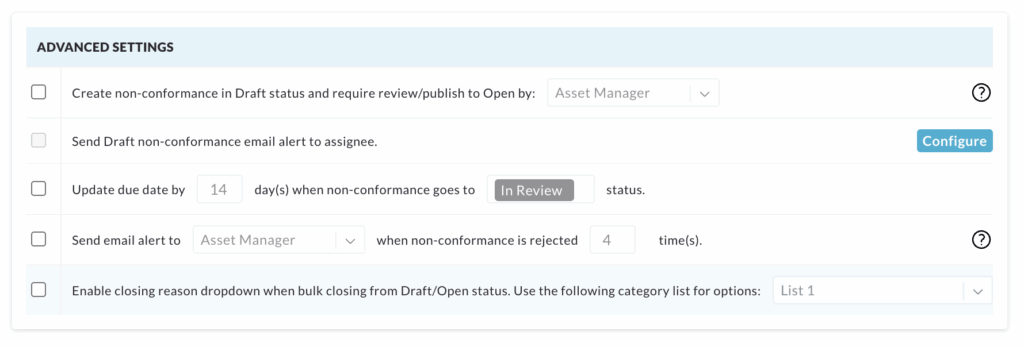
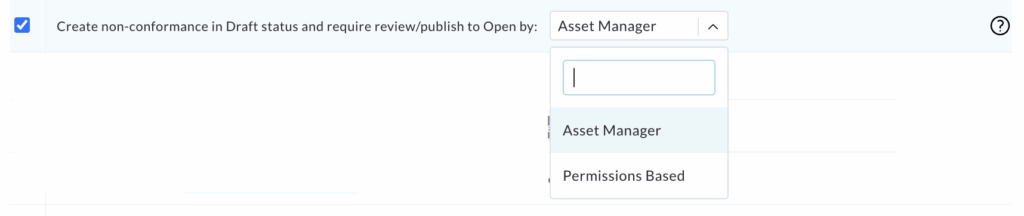
Creates non-conformances in draft status, requiring review and publishing by an Asset Manager or authorised user before they are considered open.
This prevents automatic non-conformance assignment.

This can only be selected if the prior setting has been activated.
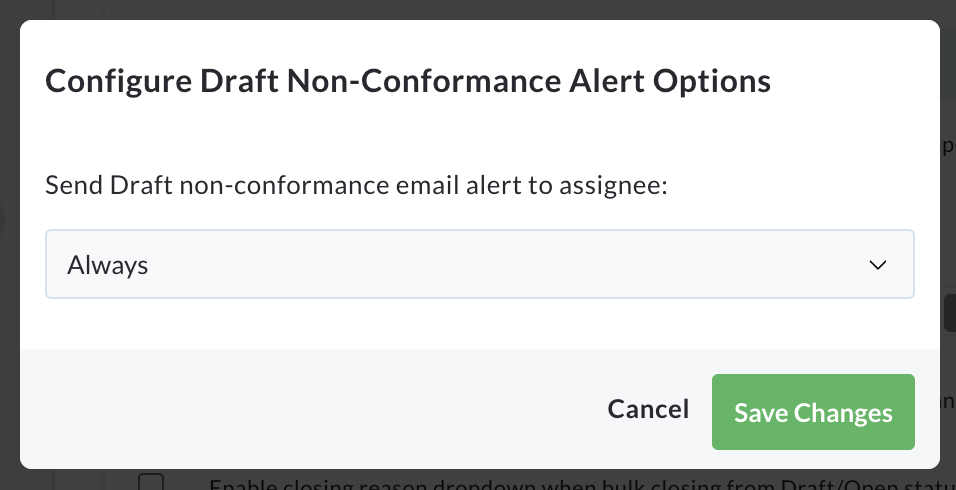
When selected, a pop up box is displayed to confirm that a draft non-conformance email should always been sent to an assignee.
Click Save Changes to confirm or Cancel to go back.

Automatically extends the due date by a specified number of days when a non-conformance goes to In Review or Reopened status, as defined in the setting.
When this option is disabled, the due date remains the same as the originally assigned date.

This setting prompts the system to send an email alert to the Asset Manager, if a non-conformance is rejected a specified number of times.

Enables a dropdown list of closing reasons when bulk closing non-conformances from draft or open status.
These categories are managed under Manage > Categories
Non-Conformance Custom Fields
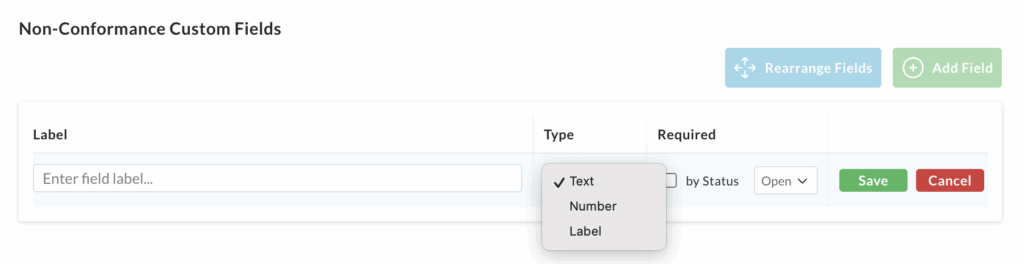
This setting allows you to add custom non-conformance fields to all audits associated with your profile.
Once you have entered the details into the text box, you must select how the non-conformance must be responded to: Text, Number or Label.
The Label option only displays the label and does not require a response.
Check the box under Required to make it mandatory to complete this custom field.
Click Save to apply the new custom label, or Cancel to remove.
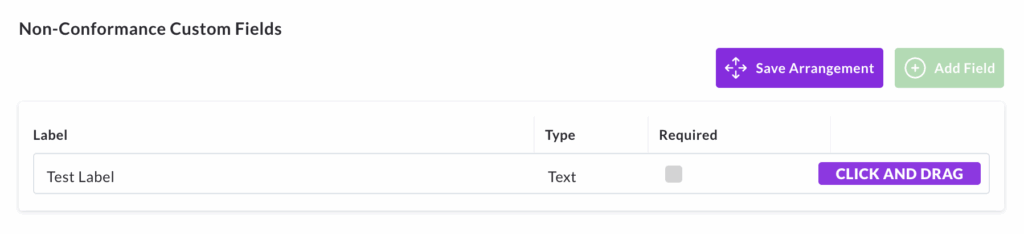
To rearrange the order of the custom fields, click Save Arrangement. You can then click and drag your labels into their new positions.
Corrective Action Custom Fields
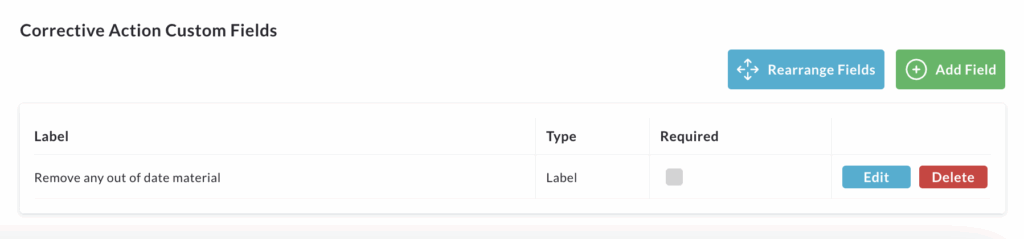
This setting applies to the Corrective Action section of Manage Non-Conformance.
To add a corrective field, click Add Field.
A new field will appear with a text box where you add the corrective action. This will be applied to all non-conformances.
Next, define the type of response required: Text, Number or Label.
Label simply displays the corrective action without requiring a response.
To make the corrective action mandatory, check the Required box.
Once finished, click Save to apply the change or Delete to remove the label.
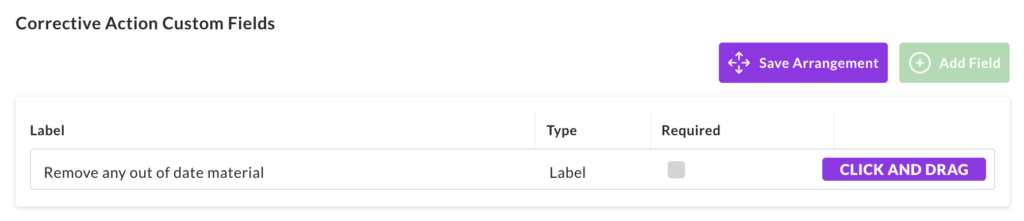
To change the order these corrective actions are displayed, click Rearrange Fields. You can then drag and drop the labels into your desired position.
Labels can be edited by clicking Edit or remove them by clicking Delete at the end of the row.