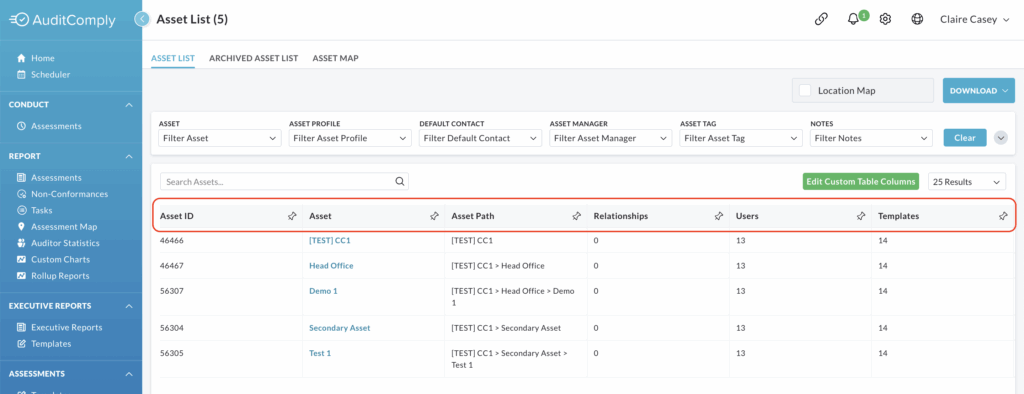
The Asset List organises your asset data into a comprehensive table, allowing for easy comparison and data management.
By default, the table provides a broad overview with the following columns:
- Asset ID
- Asset Name
- Asset Path
- Relationships
- Users
- Templates
- Risk Templates
- Default Contact
- Asset Manager
Navigating Large Data Sets
Because the table contains extensive information, it may exceed the width of your screen.
To view all available columns, utilise horizontal scrolling to to navigate to the right.
Each column has a Pin Icon. Clicking this icon locks that specific column to the left hand side of the screen.

This allows the pinned information (such as Asset Name) to remain visible as you scroll right, making it easier to cross reference data across the entire row.
For information on how to refine the table, please refer to our guide on Filtering the Asset List: https://help.auditcomply.com/asset-list/
Edit Custom Table Columns
The Asset List is customisable, allowing you to tailor the table to show exactly the information you need by removing or adding data columns.
Adding Columns
Click the Edit Custom Table Columns button.

A menu will slide open on the right hand side of the page. This menu list all the available data fields you can display.
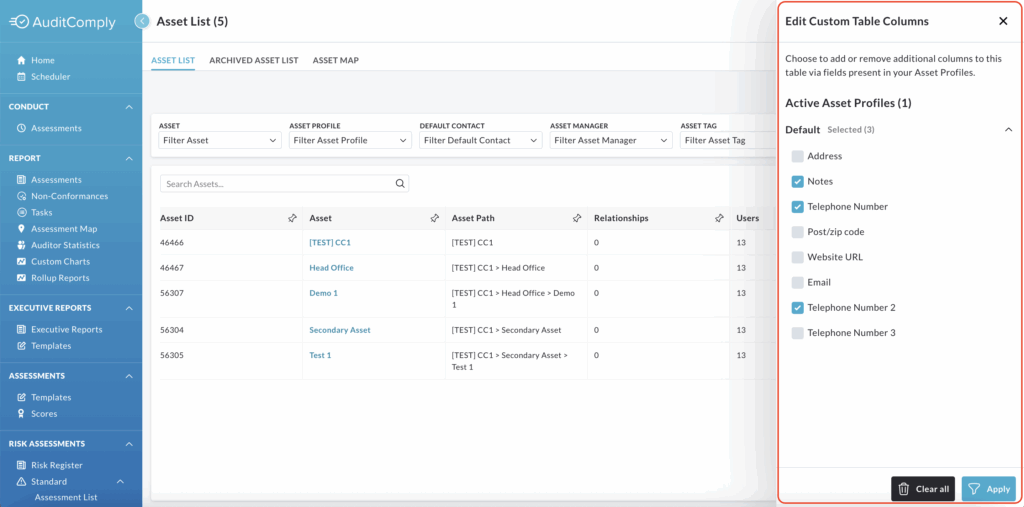
Check the box beside each item you wish to add as a new column.
Click Apply.
Please note: Any new columns will be added to the far right end of the table.
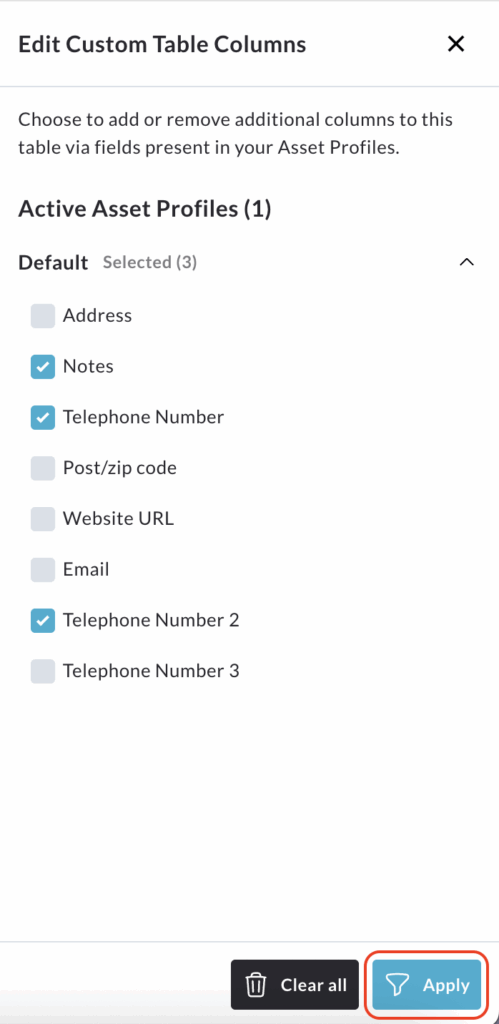
Removing Columns
Click Edit Custom Table Columns again to open the right hand menu.

Uncheck the boxes you no longer wish to see in your table.
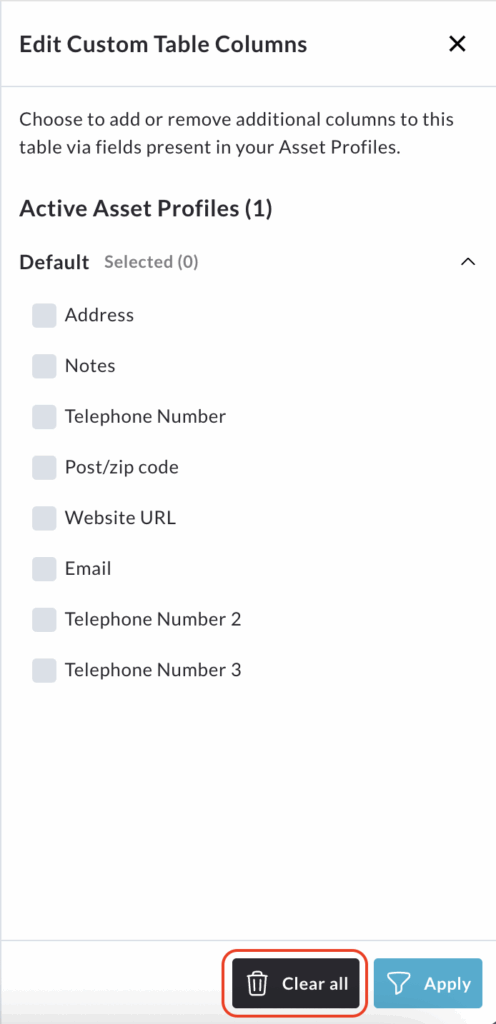
Alternatively, you can click All Clear at the bottom of the menu to remove all custom added columns at once.
Click Apply to update the table view and remove the selected columns.