These template settings override the Task settings within Organisation Settings.

Task Category Fields
This setting allows you to add custom category fields to tasks, which users can populate by selecting from a predefined dropdown list.
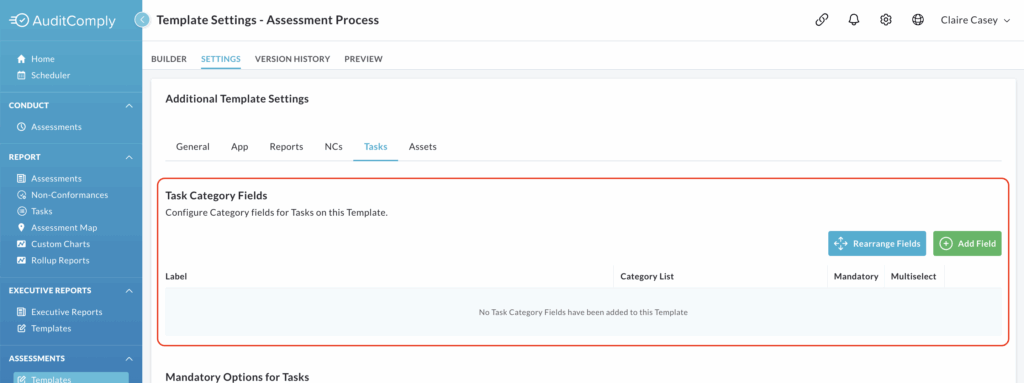
A blank table is initially displayed.
To start adding fields, click Add Field.

This will make the table editable, allowing you to define the following fields:
Label: In this text box, enter the name of your task category field.
Category List: Use the dropdown menu to select a predefined list of answers for this category.
These lists are created under the Categories section of the Manage menu.

Mandatory: Check this box if you want to require users to complete this task field when they create a task.
Multiselect: Check this box to allow users to select more than one option from the dropdown menu.
To add more category fields, click Add Field again and repeat the process.
Rearranging Fields
If you have more than one task field category, you can easily change their display order.
The order they are shown on the settings page is the same order they will appear in the template.
To rearrange, click Rearrange Fields.

This will enable you to click and drag the fields into your desired order.
Once you’re satisfied with the arrangement, click Save Arrangement to apply the changes.

To remove any category fields, simply click the Delete button at the end of the relevant row.
Mandatory Options for Tasks
This setting enables you to set certain fields as mandatory for all tasks created within an audit using this template.

Two options are available:
Make Due Date Mandatory
If you select this option (by checking the corresponding box), any user completing an audit using this template will be required to enter a due date for the task to be addressed at the time it is recorded.
Make Assignee Mandatory
If you select this option (by checking the corresponding box), it will be compulsory to assign any new task generated during an audit using this template to a specific user. This user will then be responsible for reviewing or resolving the task.
After selecting one or both of these options, you must click Update Template Settings to apply these mandatory requirements to your template.
Task History Per Requirement
Enabling this setting displays the task history for individual requirements within an audit.

When enabled, an icon will appear on each requirement, allowing you to view its history.
This icon is only displayed here if there are previous tasks recorded against that same template and requirement.
The most recent 10 tasks will be displayed for each requirement.
To enable, check the box next to Enable Task History.
To save, click Update Template Settings to save.
Show Requirement Details
This section allows you to define whether specific components of the requirement, against which a task was raised, are shown or hidden within the template.
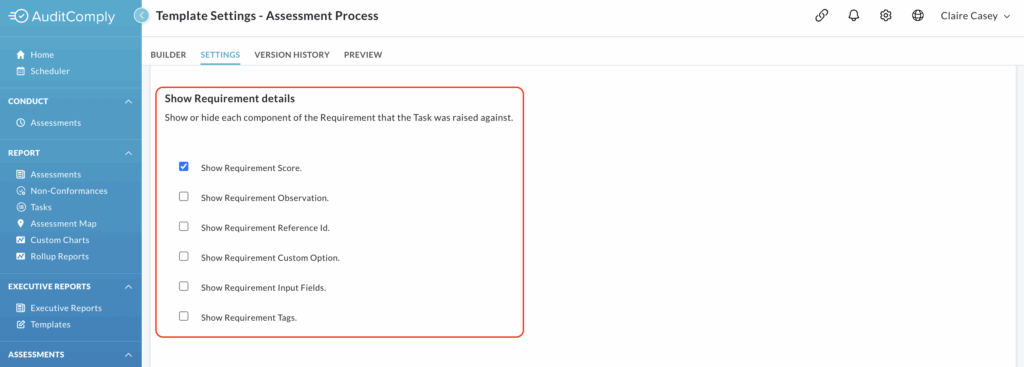
If a components box is checked, that part of the requirement will be displayed.
If the box is left blank, it will be hidden.
Show Requirement Score is enabled by default.
To activate/show check the box next to the desired component.
To deactivate/hide leave the box next to the component clear.
To save any changes, click Update Template Settings.
Score Updating
This feature allows the score of a requirement (to which a task was linked) to be automatically updated once that task has been addressed and actioned.

To enable this feature, check the box next to Enable Score Update on Approval of Tasks.
Click Update Template Settings to apply this change to your template.
Task Email Update
This setting changes the behaviour of task related email notifications.

When enabled, individual emails for each task action are disabled.
Instead, a single notification will be sent to the designated approver only when tasks have been actioned and are ready for review.
Check the box beside Disable Individual Task Email Updates Until A Task is INREVIEW to activate this feature.
Click Update Template Settings to save your changes.
Default Due Date for Tasks
This setting streamlines the process of assigning due dates to tasks by allowing the system to automatically set a default.

To activate this feature, check the box next to Enable Default Due Date.

Once enabled, a numerical text box will appear.
Here, you’ll need to enter the number of days after a task is created that it should be due. For instance, if a task is raised on 24th July and you set the time period for 4 days, the system will automatically assign a due date of 28th July.
After defining your default due date, remember to click Update Template Settings to save these changes to your template.
Default Assignee for Tasks
This setting allows you to configure a default assignee for all tasks created using this template, streamlining the process of assigning responsibility.

You have two options for setting the default assignee:
Select assignee from a dropdown list: this option allows you to choose a specific user as the default assignee. The users available in the dropdown list will be limited to users with the same asset permissions.
Set default assignee to auditor: with this option you, the system will automatically assign the task to the auditor who is completing the audit.
To enable this setting, check the box next to Set Default Assignee to Auditor.
Once a task is created, the assigned user will automatically receive a notification to resolve it.
After making your selection, click Update Template Settings to save and apply the changes.
Task User Role Assignee
This setting provides granular control over which users can be assigned tasks for a given template.

Enabling and Adding Roles
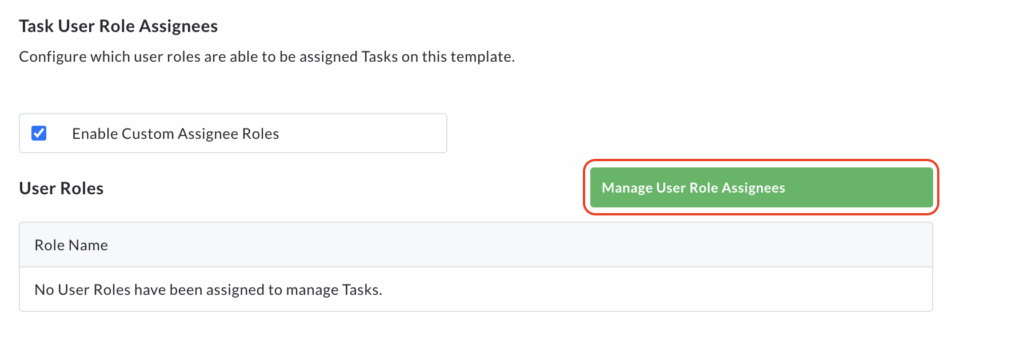
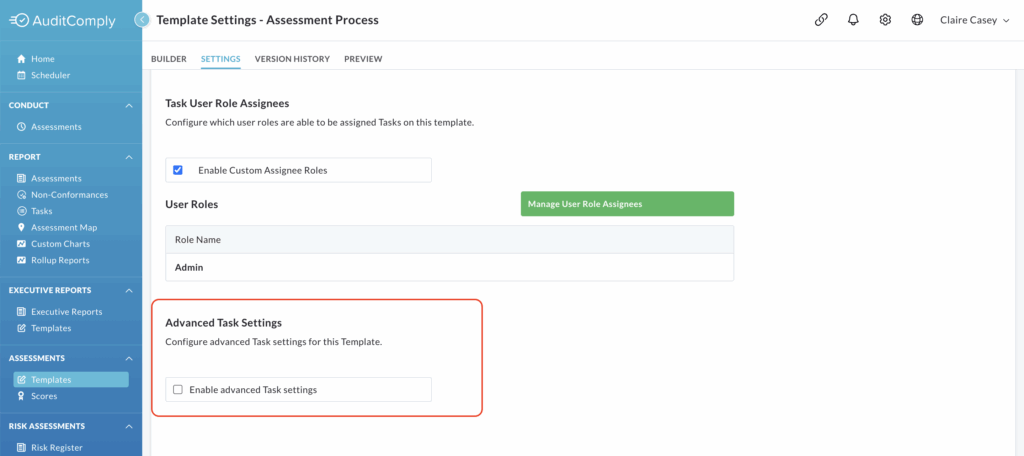
To begin configuring this setting, check the box next to Enable Custom Assignee Roles.
This action will display a new, initially empty table titled User Roles.
To add roles to this table, click Manage User Role Assignees.
A pop up window will appear.
In the No Access column, you’ll see a list of all available user roles.
Select the roles you want to have the ability to be assigned tasks by checking the boxes next to their names.
Once selected, click the right pointing arrow to move them into the Access column.
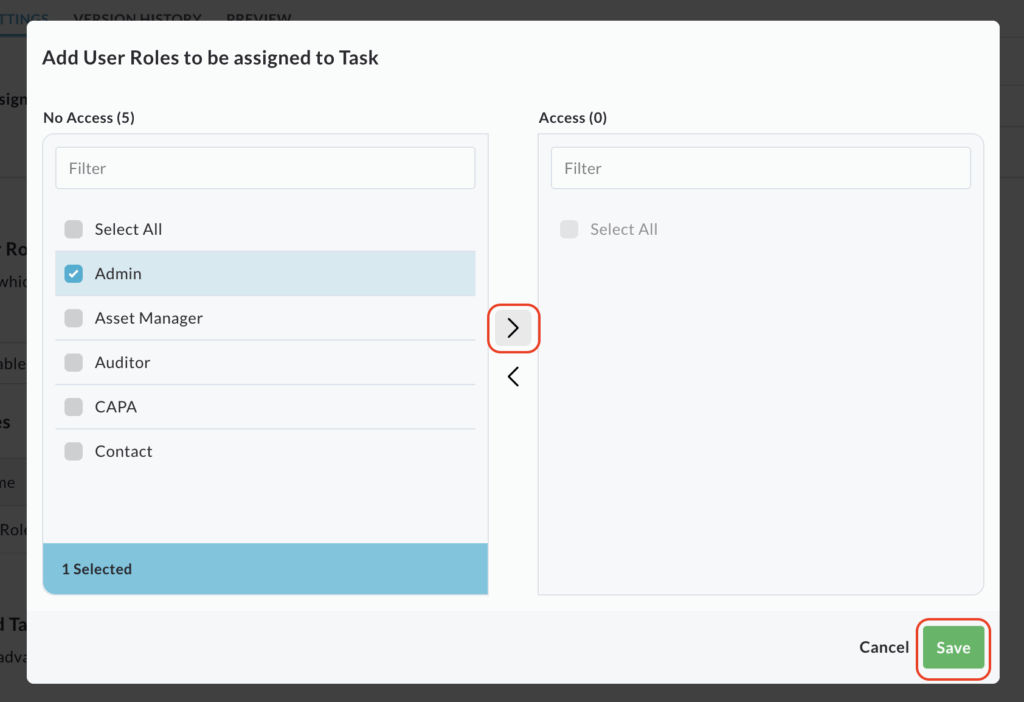
Click Save.
The User Roles table on the main settings page now be updated to display the roles you have selected.

Removing/Editing User Roles
To edit or remove a user role’s ability to be a task assignee, click Manage User Role Assignees.

The pop up window will reappear, showing the current roles in the Access and No Access columns.
From here, you can amend the users within the columns by moving them back and forth with the arrows as needed.
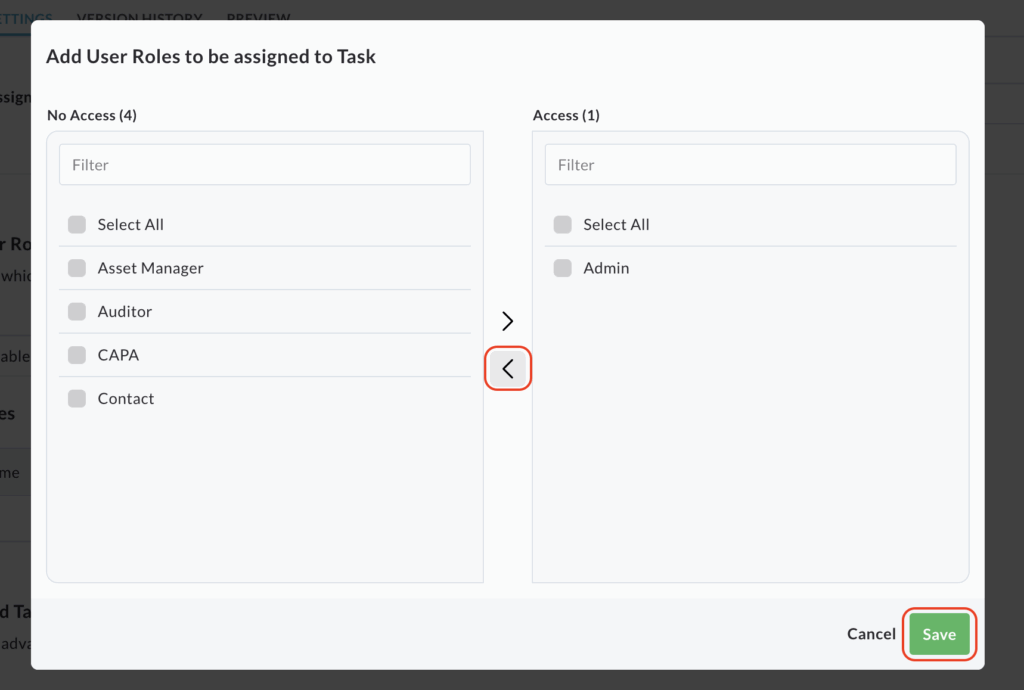
Please note: if you move all the user roles back to the No Access column and save, the User Roles table will no longer be displayed on the Task Settings page.
Unclicking the Enable Custom Assignee Roles box will also remove the table from the settings screen, however, clicking the box again will display the table with the settings you had previously enabled.
Advanced Task Settings
This section allows you to enable more complex workflows for tasks created using this template.
To enable these settings, check the box next to Enable Advanced Task Settings. This will cause a table of options to appear on the page.
Draft Status and Publication
The first option you can configure is Create Task in Draft Status and require review/publish to open by:’. From the dropdown menu, select the appropriate role.
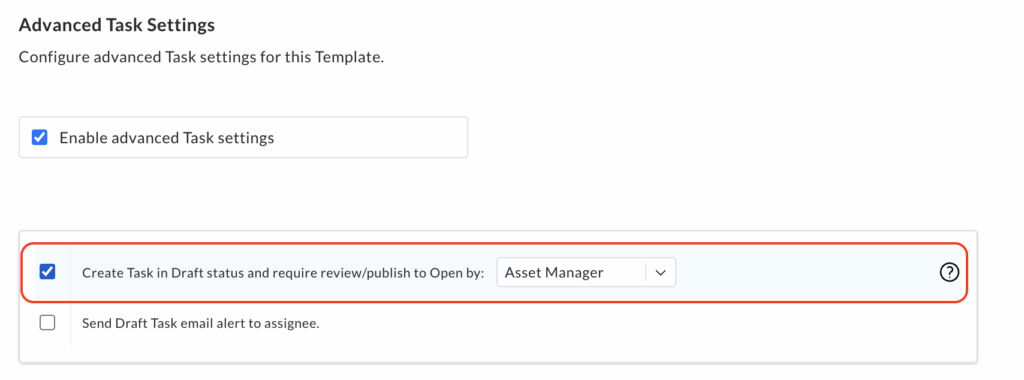
When this is enabled, any tasks created during an audit will initially be opened in draft status. It will not be active or ready for resolution until the selected user or role reviews and publishes it.
This adds an additional layer of verification before a task becomes official.
Draft NC Email Alert
Once the first option is enabled, the second option becomes available: Send Draft Task email alert to Assignee.
Check this box to prompt the system to send an email notification to the relevant assignee(s) of the draft task.
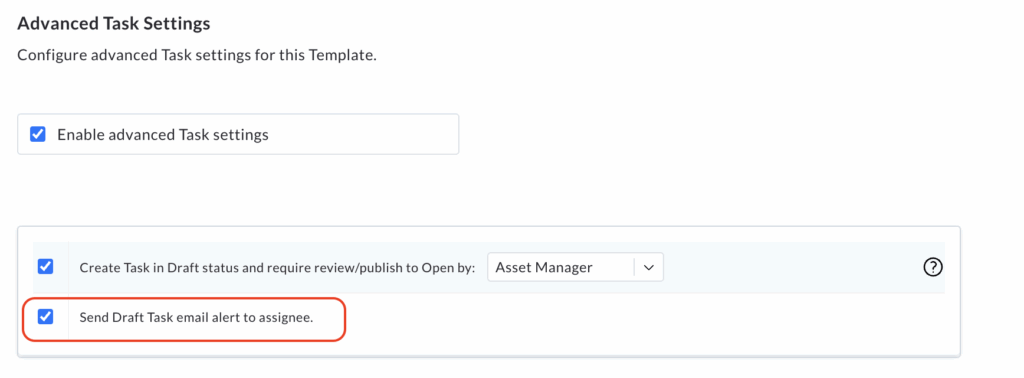
This alert will inform them that a new draft task is awaiting their review and needs to be either published or rejected.
After configuring both of these options as desired, click Update Template Settings to apply your changes.

